No playtime for me this weekend, as I had to work on taxes. My hubby owns his own business, so our taxes take a little longer to collect all the info and I need to turn it into the accountant this coming Saturday. I missed my creative, so no cards to post today. Makes me a little glum :(
But now for the announcement...
Happy, happy, joy, joy!
...I made the Fantabulous Cricut Challenge Blog Design Team and I am so excited to part of the FCCB team. Thank you so much Robin for selecting me and giving me this opportunity to work with all the returning and new DT members. So here's to Fantabulous inspiration, sharing and friendships. Cheers!
Catch the Frenzy!

Monday, February 27, 2012
Friday, February 24, 2012
Darn it, I missed the deadline!
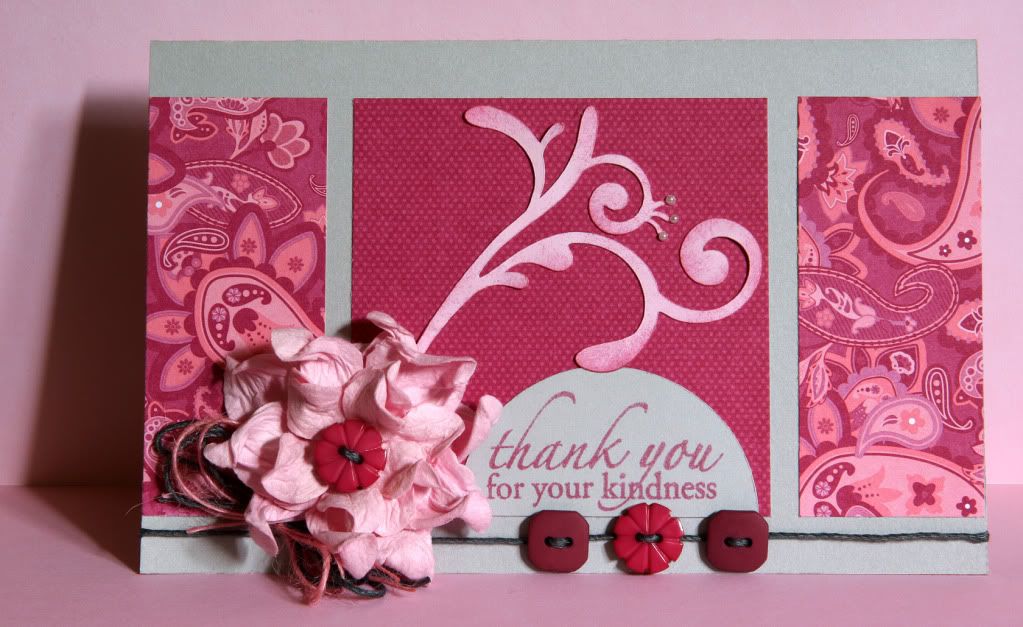 This card was made for the Freshly Made Sketches #22, but Darn It, I missed the deadline to link and play along. I was sick with a sore throat and low energy and just wasn't clearly thinking? Oh well! Anyway, I wanted to make sure to post it anyway so that my followers would be able to not only check out my card, but tall the other wonderful creatures linked at FMS. So enjoy!
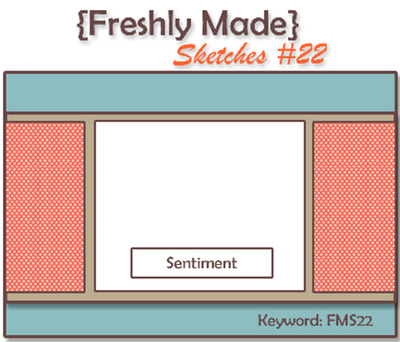
To make this card:
I used a 4-1/2" x 7" grey cardstock for the base. My pattern paper were cut two ends at 1-1/2" x 3-1/2" and one center at 3-1/2" x 3-1/2". I cut a grey circle at 2-1/2" from the George and Basic Shapes.
To complete this card:
I used Straight from the Nest cartridge, page 70 <Floursh3> at 3", stamped the sentiment in the grey circle . I sponged around the flourish, added grey bamboo twine with buttons slipped through. Added a great pink flower, which I received in a goodie box from The Crafts Meow Shop. To this flower I added another button and a bow made with the great bamboo twine and pink fibers I had on hand.
Catch the Frenzy!
Tuesday, February 21, 2012
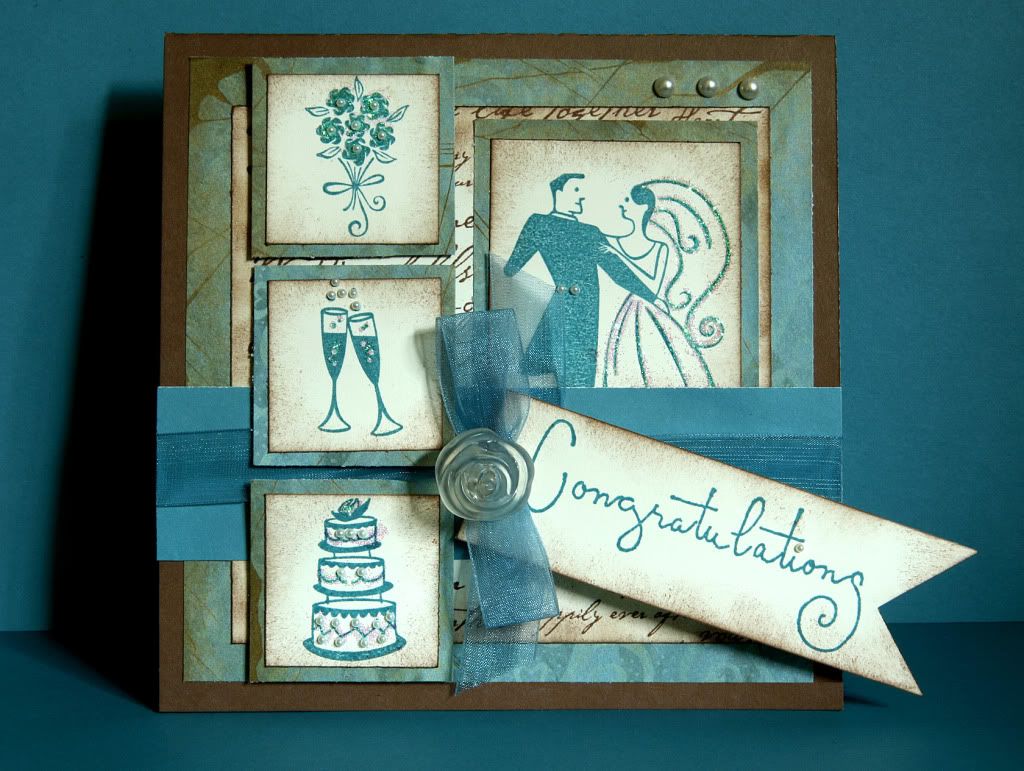
Wedding elegance
To make this card:
I started with a 6" x 6" chocolate brown cardstock base. I added the pattern paper, cut at 5-1/2" x 5-1/2". Next I stamped a large background stamp with love words and sayings onto cream cardstock. I cut this piece down to 5" x 5". All small images were stamped on three 1-1/2" squares in twilight ink. The Bride and Groom were stamped on 2-1/4" x 2-1/2" cream cardstock, twilight ink. These pieces were all mounted to pattern paper cut 1/4" larger.
To finish the card:
I added chocolate ink sponging around all paper with stamped images, Glitter and adhesive pearls for glamour. A ribbon in a lighter shade of teal was added around a 1-1/2" x 6" twilight piece of cardstock. I tied a bow in this ribbon and slipped the bow through the hole punch in the sentiment banner that was stamped in twilight ink on cream cardstock cut at 1-3/4" x 4-1/4" The clear rose button was my final touch.
Now I just need to find someone who is getting married.
Catch the Frenzy!
Cas-ual Fridays
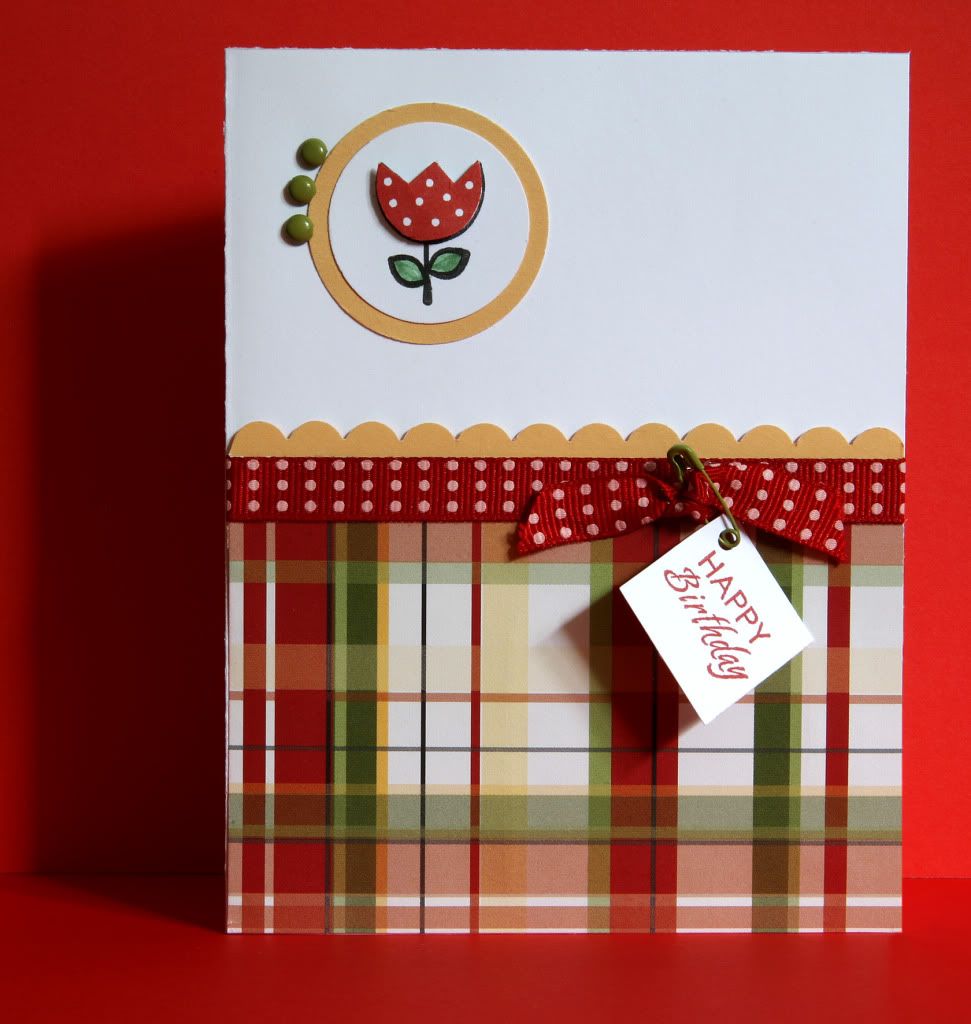 This card is being entered in the Cas-ual Fridays #CFC40. The challenge is to create something in honor of Mardi Gras/Party card with ribbon. I decided to enter two cards. This simple Happy Birthday card and a Whimsical Be Happy card which was also submitted to another challenge iSpy Sketches which you can read about in previous post.
To make this card:
I started with a white A2 cardstock base. I used some plaid pattern paper cut at 3" x 4-1/4". Using my circle punches (CM) I cut one at 1-1/4" on white the other at 1-1/2" in taffy (Close to My Heart paper) . Stamp the image on the white circle using black ink, stamp a second one on extra scrap in red ink. Cut the flower only out and mount on top of the one stamped on the circle. Color the leaves in green. I also cut a small piece of white cardstock 1" x 1" and stamped the Happy Birthday in cranberry ink.
To finish the card:
I cut a strip of 1" x 4-1/4" taffy and used my scallop edges scissors to trim. Add this trim to the back of the plaid pattern paper. I then adhered the red polka dot ribbon over the top of this peice, attached a bow and hang the message with a green safty pin. I also added three green brads to the top left corner around the circles.
Simple and sweet!
Catch the Frenzy!
Whimsical Be Happy
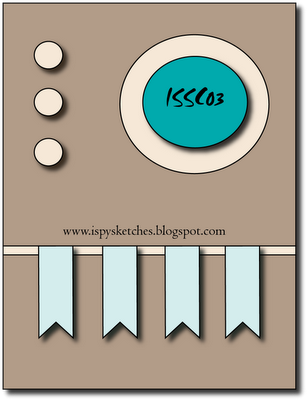
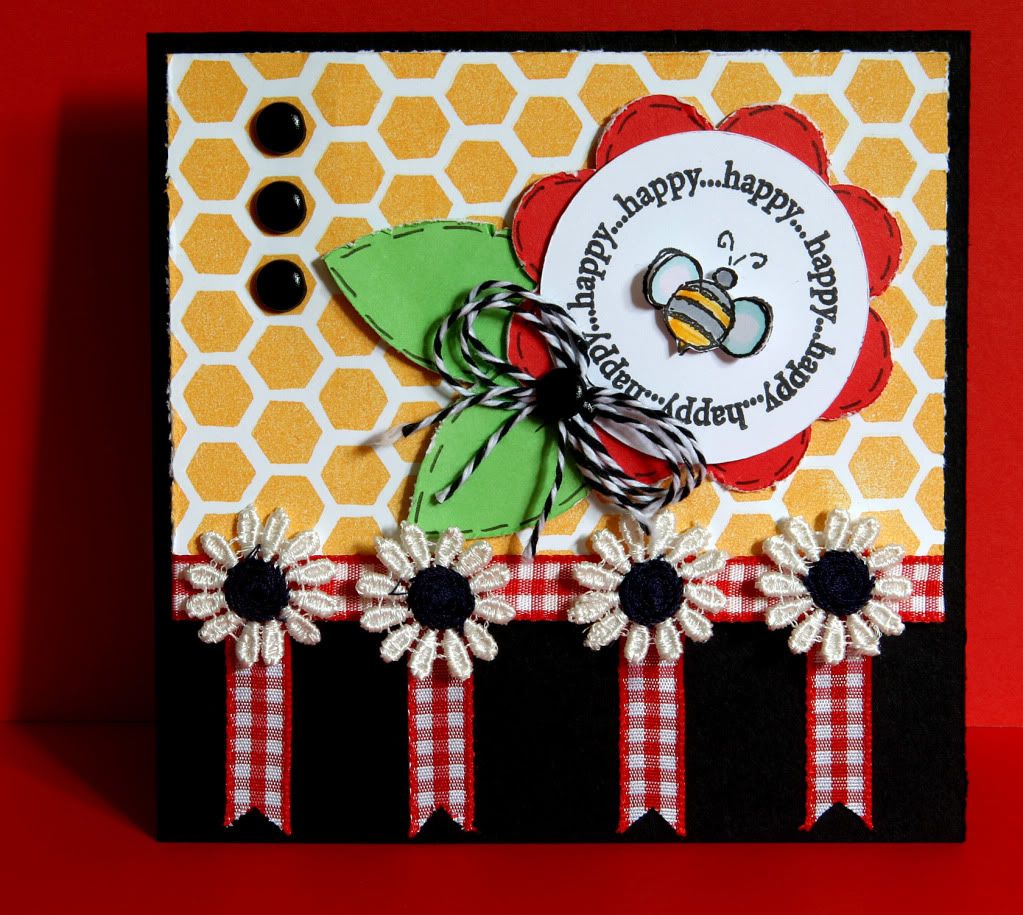 I happened upon this blog iSpy Sketches and so enjoyed their blog with the Special Agent theme, mystery and intrigue. I love reading and watching mysteries and knew immediately that I wanted to be a part of this challenge. So this card is for their ISSC03 based on this sketch below.
This card is also being entered in the Cas-ual Fridays challenge CFC #40
To make this card:
I used a 5 x 5 black cardstock base. As I was digging around in my craft room, I came across a peice of already stamped honeycomb image, that must have been left over from a class I taught many years ago. So that is what I used. It was cut down to 3-1/2" x 4-3/4".
To complete this card:
I used the George and Basic Shapes to cut a 2" white circle, Elegant Edges, page 28 <Flower1-s> cut at 2-1/2" in red and the Walk in My Garden, page 109 cut two 1" green <leaf1> using the blackout feature. I stamped my image and sentiment (both Close to My Heart) on the white circle, colored in the bumblebee with my Tombow markers. Added pen ink stitches around the flower and leafs. I distressed all edges, including the honeycomb paper. My finishing touches include 3 large black brads, red gingham ribbon and banners. I used some daisies from a ribbon that was in my goodie box I purchased at The Crafts Meow Shop, which has been some much fun! And last but not least, a black baker twine ribbon bow with a black brad in the center was added to the flower.
So Be Happy and Catch the Frenzy!
Monday, February 20, 2012
A Splash of Hot Pink

To make this card:
I used a 5-3/4" x 5-3/4" black cardstock as my base. I wasn't paying attention, as I was going to cut it at 6" x 6". Not one to waste paper, I used the slightly smaller size. I then layered grey 5-1/4" x 5-1/4" and white 5" x 5". I also cut a 1-1/2" x 5-3/4" strip of hot pink gingham pattern paper.
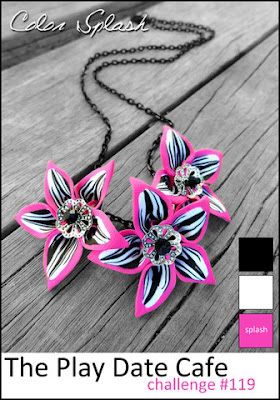
To finish this card:
I stamped the floral image, from an older wood mounted Close to My Heart stamp. I'm truly trying to work with what I have and it's been great fun revisiting older images I haven't used for years. I added a grey outline to the image with my Tombow markers and stamped a sentiment in the lower left corner. I stamped the focal point flower from the image a second time on hot pink gingham pattern paper. This second image was cut out and mounted on top of of the full image. To finish the card I used black bakers twine from Doodlebug Design and some hot pink rhinestones. Layer all paper as shown in the picture.
Catch the Frenzy!
Sunday, February 19, 2012
Sweet Hello
 Today I am sharing a card I made for The Shabby Tea Room "Hi Ho Cherry O', week #101 challenge using this photo as my inspiration. We have a very old cherry tree in our yard that doesn't produce many cherries anymore. What is produced, the birds and raccoon's seem to eat before I get a chance to pick them. I sure love the springtime blossoms though and this challenge just made it feel like spring already.
To make this card:
I started with a light green A2 card base, added doily edges to both sides of the card. Striped and cherry pattern paper from my stash of old Close to My Heart papers were used in the project. I was also so very excited that I exactly had a cherry stamp to use for this challenge, also from CTMH.
Cartridge used:
Elegant Edges page 65 <Flower3> using the oblong feature and shadow cut at 4"
To finish this card:
I used Tim Holtz Distress Ink - Tea Dye to distress my doily and frame. I stamped my image in the center of the frame, as well as on another piece of white cardstock. I used a stencil/sponging technique to color my cherries and leaf. I then cut them out and mounted them over the image stamped on the frame. Other finishing details were to add Glossy Accents to the hi-light on the cherries, red baker twine to red buttons, and made a bow with the twine. I also added the buttons to these little green flowers I received in a goodie box I purchased from The Crafts Meow Shop.
I hope you too feel a little bit of spring in my card. Enjoy your Day!
Catch the Frenzy!
Tuesday, February 14, 2012
Happy Valentine's Day
One last Valentine card to share...
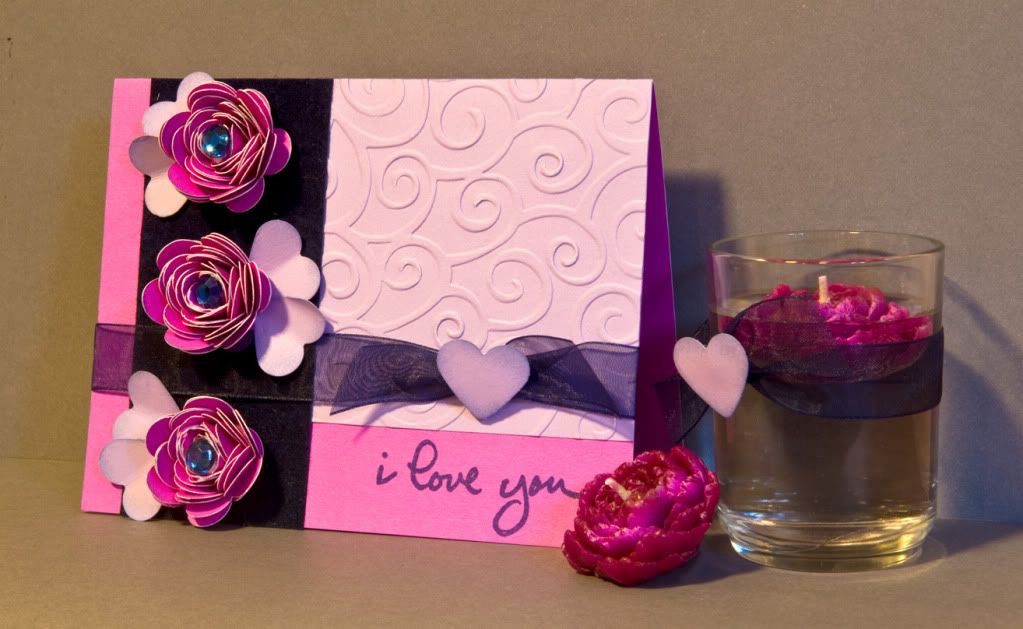
I wasn't going to post today, but since my hubby and I had no plans for Valentine's Day, as I am still recouping from a Medical procedure I had on Monday morning, I decided to share a card that was inspired by two little rose candle's a co-worker gave to me as a gift at Christmas. She found them in a shop in Ashland, OR and they are so sweet (Thanks Kim!). Shortly after getting these candle's, I received my Flower Shoppe cartridge in the mail and wanted to play around with making some roses. Anyway, the result is the card pictured below.
 To make this card:
A2 bright pink cardstock for base of card. I used the Flower Shoppe cartridge to create my roses in the same bright pink color, adding blue rhinestones to the center of each rose. I ran a light lavendar paper through my Cuttlebug using the swirl folder. The dark blue paper is a velvet peice I found in my stash of paper.
To complete this card:
I used a heart punch to create the light lavendar leaves, sponged around the edges with Navy ink and stamped the message in the same ink color. I also added a dark blue ribbon to the card.
I hope each of you enjoyed your Valetine's Day with your someone special. My someone special just arrived home with my favorite ice cream - Mint Chocolate Chip! He is so good to me!
I wasn't going to post today, but since my hubby and I had no plans for Valentine's Day, as I am still recouping from a Medical procedure I had on Monday morning, I decided to share a card that was inspired by two little rose candle's a co-worker gave to me as a gift at Christmas. She found them in a shop in Ashland, OR and they are so sweet (Thanks Kim!). Shortly after getting these candle's, I received my Flower Shoppe cartridge in the mail and wanted to play around with making some roses. Anyway, the result is the card pictured below.
A2 bright pink cardstock for base of card. I used the Flower Shoppe cartridge to create my roses in the same bright pink color, adding blue rhinestones to the center of each rose. I ran a light lavendar paper through my Cuttlebug using the swirl folder. The dark blue paper is a velvet peice I found in my stash of paper.
To complete this card:
I used a heart punch to create the light lavendar leaves, sponged around the edges with Navy ink and stamped the message in the same ink color. I also added a dark blue ribbon to the card.
I hope each of you enjoyed your Valetine's Day with your someone special. My someone special just arrived home with my favorite ice cream - Mint Chocolate Chip! He is so good to me!
Catch the Frenzy!
Sunday, February 12, 2012
I thought of you today
 and smiled!
This card is being entered in the Freshly Made Sketches #21 A sketch from Lesley (Seeing Double). See the inspiration sketch below, and also check the blog for other wonderful creations.

To make this card:
A2 cardstock base in a cream color with black, cream and tan pattern paper from Close to My Heart.
I used the <Design1> from Elegant Edges cartridges to make my label found on page 27. I used the oblong frame and shadow cut at 3"
To complete this card:
Using the sketch as my inspiration, I layered my paper as shown in my card photo. I stamped the "I thought of you today" message inside the label, and then stamped "and smiled" in the bottom right corner (stamps from CTMH). I cut three flowers out of the pattern paper I used, curled the edges and layered them together. The last I wanted to add was a pop of RED using brads and twine.
 |
| Close up of my cut out flowers from the paper |
Catch the Frenzy!
3 Valentine shares
Thanks for stopping by today...I have 3 Valentines and one tutorial to share with you
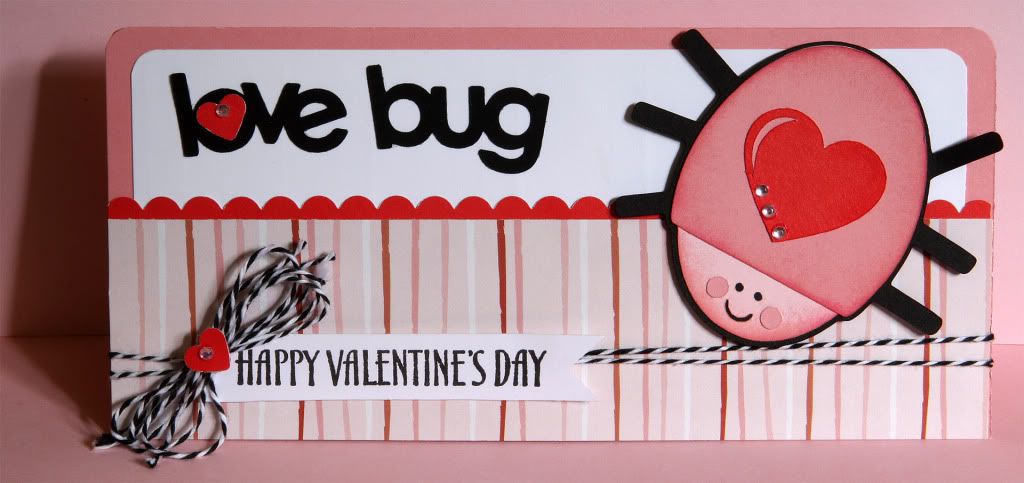
1.) Love bug
This one makes me smile :) and the colors are one of my favorites together... Black, Red and Pink. This card will be entered in the Fantabulous Cricut Challenge #97 - Love is in the air (use a heart) check out all the other fabulous ideas at on their blog.
 To make this card:
 Start with a pink 7" x 8" cardstock folded in half for the base. I rounded the top corners of the pink base, as well as the white 2" x 7-1/2" piece. Next I trimmed a 8" x 1" piece of red cardstock with my scallop scissors. The piece is striped pattern paper is cut at 2" x 8". All paper is from my stash of Close to My Heart products. Layer pieces together as shown in photo, working back to front.
To complete this card:
I used the Simply Charmed cartridge, page 31 <Lovebug1> cut at 3", all layers, shadow and word. Sponging around the bug in darker pink ink. I stamped the "Happy Valentine's Day" message (CTMH) on white cardstock and clipped the ends with a square punch to make it into a banner. I wrapped black bakers twine (Doodlebug Design, Inc) around the bottom of the card, added a bow, small heart punch to both the bow and the "O" then blinged my love bug and hearts with pink rhinestones.
2.) Sending you love - envelope creation for gift card
This idea is something I have been making for 10+ years when I want to give a gift card to a friend. I haven't played around with the tutorial video idea yet, so I will explain it with pictures below. I will be entering this card in My Craft Spot Challenge #43 Valentine's Day (card or treat packaging).
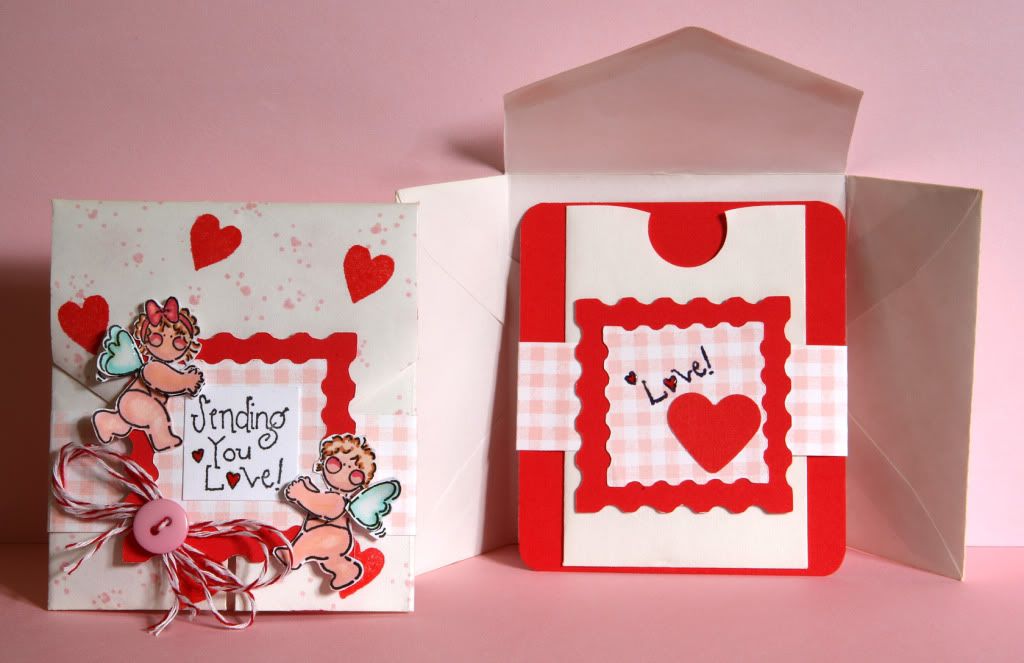
Use a standard 3-1/2" x 6-1/2" white envelope, keep the flap open and random stamp the entire envelope, front and back. I used a really old Close to My Heart background stamp (well love & well used) with a tiny heart cluster pattern with pink ink. I then went back and filled in using a bold heart stamp from Impress with red ink.
I then cut two sets <Stamp-s> page 37 from the Elegant Edges cartridge, two at 2" red cardstock, the other cut two at 1-1/2" pink gingham pattern paper. One set for the decorative flap and the other set for the inside card holder. I also have two 1" x 9" pink gingham pattern paper strips that a wrapped around the envelope to hold side flaps in place, and repeated idea on inside card holder.
To complete this card:
I used black ink to stamp the "Sending you Love!" message (CTMH) on white square and marker to ink on the word "Love!" only for the inside card holder piece. My two little cherubs (CTMH) were colored and shaded with my Tombow markers (I so want to purchase some Copic markers soon), cut out the cherubs, extra wings and arms for dimension. Layer all pieces as shown in photo. Only adhere the top portion of the stamped Cricut cut to the flap. For the inside gift card holder I adhered a small envelope I had in my stash for goodies. I punched the top with a circle punch so it would be easier to pull out the gift card. For finishing touches I added a heart punch to the inside gift card holder, red baker twine bow with button and glossy ac
cents to the wings and tint hearts in message.
Read more on How to make the envelope and to see the third share.
Sunday, February 5, 2012
Little Cuties
Today I have 3 posts share, so make sure you check them out.
We have been invited to a Super Bowl party, so I wanted to make sure I got all my cards completed, my blogging done, and challenges linked before we left the house. I am also teaching a card class with some wonderful friends Monday night. All my samples and prep work also done.
These 2 little cuties were created for Fantabulous Cricut Challenge blog - #96 Valentiny Cards 3 x 3 and for my card class Monday night. I can only enter one in the challenge, but wanted to share both cards on my blog.
 To make these cards:
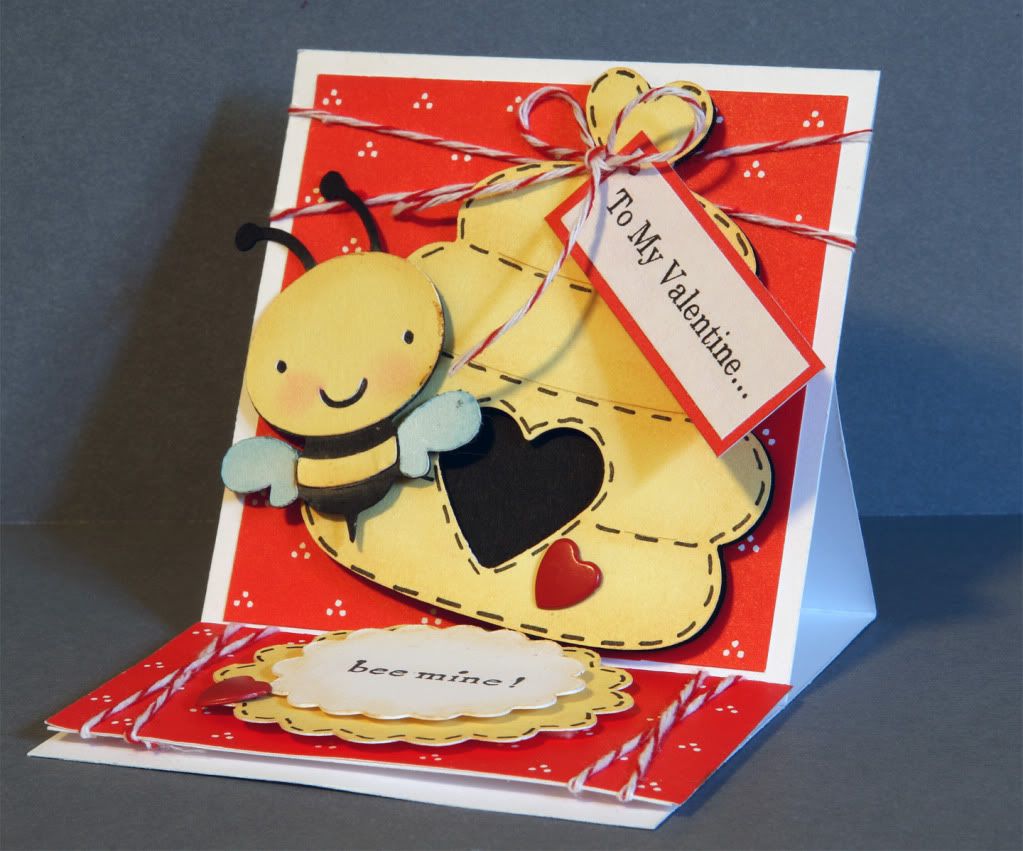
For Bee Mine easel card...
White card stock for base of card. You will need 1 piece cut 3" x 6" for base of card, another piece cut at 3" x 3" for front of card and the last piece is 1-1/2" x 3" for inside. The red pattern paper is cut at 2-3/4" x 2-3/4" and another piece cut at 1-1/2" x 3"
Cartridges used:
Create A Critter - page 68 <Bee> cut at 1-1/2" with layers and beehive using the Accessory feature cut at 2-1/2". I used scrap cardstock to create the Cricut cuts in Yellow, White, Black and Blue
Elegant Edges - page 65 <Flower3> using the Oblong feature cut at 2" Yellow and 1-1/2" White
To complete this card:
I used a heart shape punch to create the opening int he beehive. Created the To my Valentine message on the computer and stamped the bee mine! message on the white oblong shape. Added red heart brads and red bakers twine as seen in the photo. Adhere all pieces working back to front as shown in the photo.
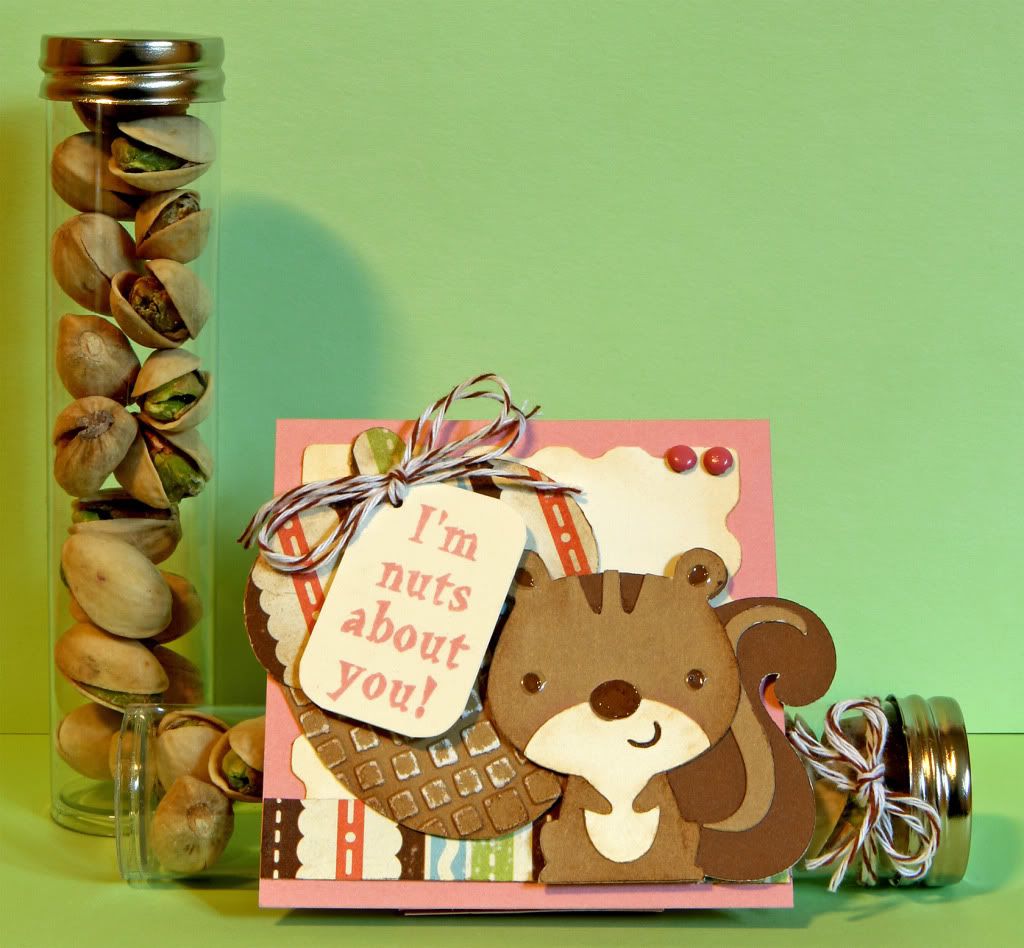
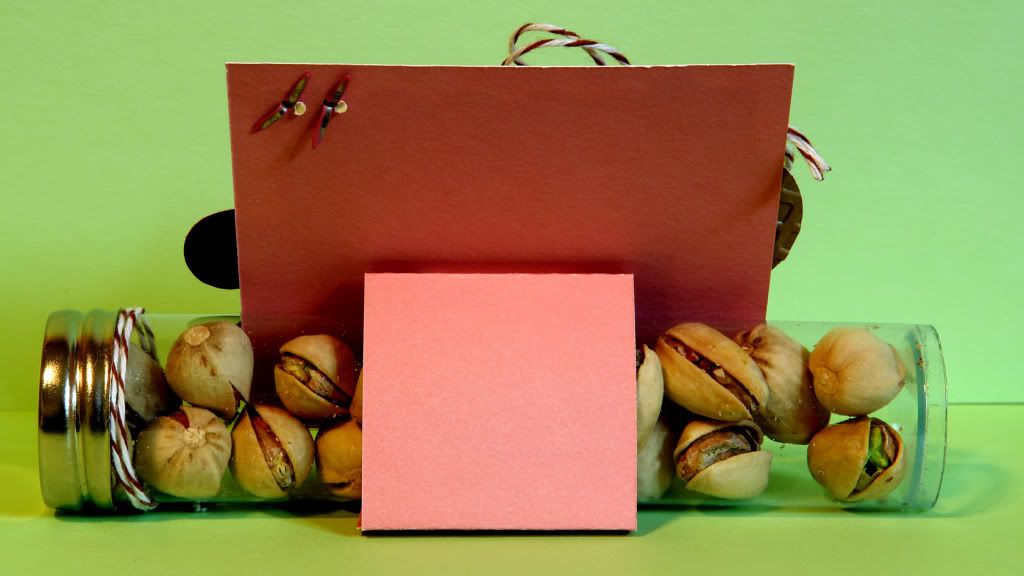
I'm Nuts about you!
Cut 3" x 3" Pink cardstock for base and another piece of pink cardstock 1-1/2" x 6" for back easel piece.
Cartridges used:
Create a Critter - page 32 <Squirrel> cut at 2" and all layers. Acorn piece is cut at 2-1/2" using the Accessory feature.
Elegant Edges - page 37 <Stamp-s> cut at 2-1/2" in cream cardstock
To complete this card:
I ran the acorn through my Cuttlebug using the tiny Mosaic A2 folder then sanded the front. Stamp the message, (from Close to my Heart) in pink on a tag I cut myself and rounded the corners. I then added chalks to the edges, pink brads to the top right corner and brown bakers twine to finish the card. I filled a tube with pistachio nuts and tucked under my easel tab at the back.
Keep reading two more post below.
Catch the Fenzy!
We have been invited to a Super Bowl party, so I wanted to make sure I got all my cards completed, my blogging done, and challenges linked before we left the house. I am also teaching a card class with some wonderful friends Monday night. All my samples and prep work also done.
These 2 little cuties were created for Fantabulous Cricut Challenge blog - #96 Valentiny Cards 3 x 3 and for my card class Monday night. I can only enter one in the challenge, but wanted to share both cards on my blog.
To make these cards:For Bee Mine easel card...
White card stock for base of card. You will need 1 piece cut 3" x 6" for base of card, another piece cut at 3" x 3" for front of card and the last piece is 1-1/2" x 3" for inside. The red pattern paper is cut at 2-3/4" x 2-3/4" and another piece cut at 1-1/2" x 3"
Cartridges used:
Create A Critter - page 68 <Bee> cut at 1-1/2" with layers and beehive using the Accessory feature cut at 2-1/2". I used scrap cardstock to create the Cricut cuts in Yellow, White, Black and Blue
Elegant Edges - page 65 <Flower3> using the Oblong feature cut at 2" Yellow and 1-1/2" White
 |
| side view |
I used a heart shape punch to create the opening int he beehive. Created the To my Valentine message on the computer and stamped the bee mine! message on the white oblong shape. Added red heart brads and red bakers twine as seen in the photo. Adhere all pieces working back to front as shown in the photo.
I'm Nuts about you!
Cut 3" x 3" Pink cardstock for base and another piece of pink cardstock 1-1/2" x 6" for back easel piece.
Cartridges used:
Create a Critter - page 32 <Squirrel> cut at 2" and all layers. Acorn piece is cut at 2-1/2" using the Accessory feature.
Elegant Edges - page 37 <Stamp-s> cut at 2-1/2" in cream cardstock
 |
| Back view |
I ran the acorn through my Cuttlebug using the tiny Mosaic A2 folder then sanded the front. Stamp the message, (from Close to my Heart) in pink on a tag I cut myself and rounded the corners. I then added chalks to the edges, pink brads to the top right corner and brown bakers twine to finish the card. I filled a tube with pistachio nuts and tucked under my easel tab at the back.
Keep reading two more post below.
Catch the Fenzy!
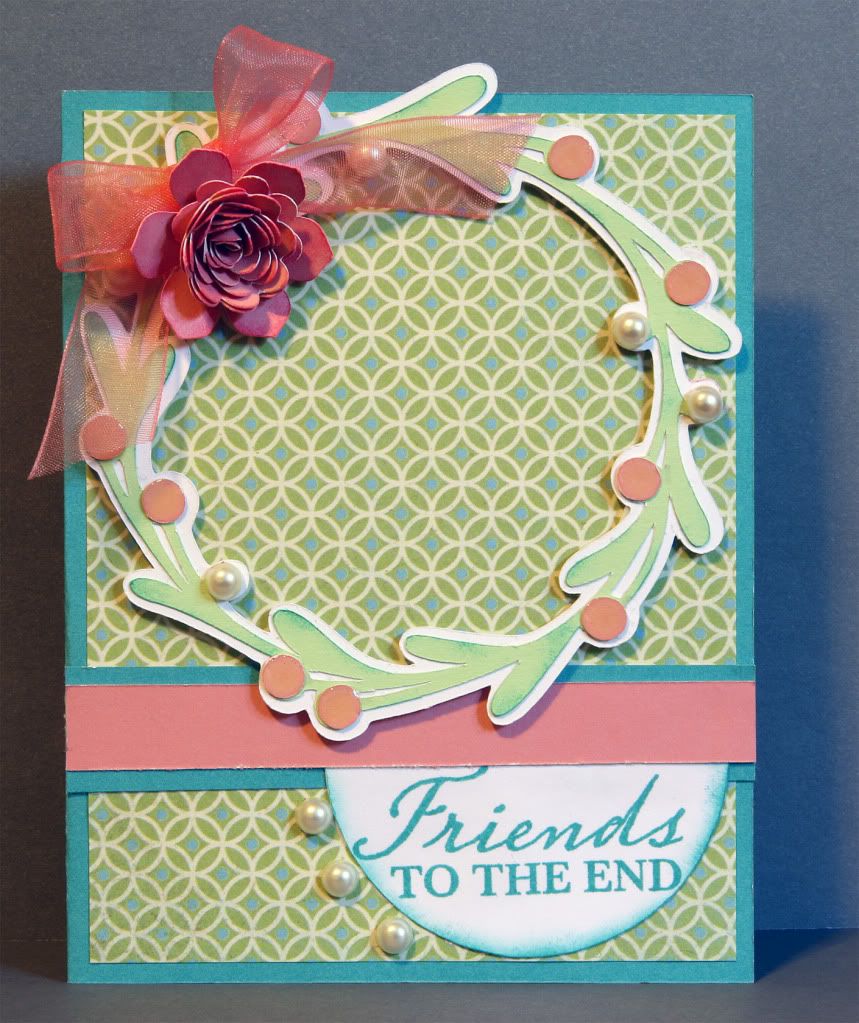
Friends to the end
While digging around in my stash of paper, I came across this pattern paper from Close to My Heart. I do not remember what paper pack it was from, as I no longer am a consultant and I have a lot of paper. Anyway, I love this color combo and wanted to make something a little more elegant. This card will be entered in the My Craft Spot Monday Challenge - Anything goes. Make sure you check out all 3 post today for other card ideas.
 To make this card:
A2 Teal cardstock for base of card
4" x 5-1/4" pattern paper
2-1/2" white cardstock half circle
3/4" x 4-1/4" Teal cardstock
1/2" x 4-1/4" pink
Cartridges used:
George and Basic Shapes - page 108 <circle> cut at 2-1/2" white cardstock
Joys of the Season - page 66 <Wreath2> cut a 4" green cardstock, shadow feature white cardstock and layers for the berries in pink cardstock
Flower Shoppe - page 16 <Fun4> and page 13 <Scallop1> both cut at 1-1/2" pink
To complete this card:
Stamp the message on the white cardstock 1/2 circle in Teal. I then sponged Teal ink around the edges of the wreath and the half circle. I sponged darker pink around the edges of both flower pieces. Layer all paper together working back to front as shown in the photo. For finishing touches I added Glossy accents to the pink berries and adhesive pearls to the wreath, and at the curve of the message. A Pink ribbon at the top corner with the flower completes this card.
Please continue to my early post today for another card I posted.
Catch the Frenzy!
To make this card:A2 Teal cardstock for base of card
4" x 5-1/4" pattern paper
2-1/2" white cardstock half circle
3/4" x 4-1/4" Teal cardstock
1/2" x 4-1/4" pink
Cartridges used:
George and Basic Shapes - page 108 <circle> cut at 2-1/2" white cardstock
Joys of the Season - page 66 <Wreath2> cut a 4" green cardstock, shadow feature white cardstock and layers for the berries in pink cardstock
Flower Shoppe - page 16 <Fun4> and page 13 <Scallop1> both cut at 1-1/2" pink
To complete this card:
Stamp the message on the white cardstock 1/2 circle in Teal. I then sponged Teal ink around the edges of the wreath and the half circle. I sponged darker pink around the edges of both flower pieces. Layer all paper together working back to front as shown in the photo. For finishing touches I added Glossy accents to the pink berries and adhesive pearls to the wreath, and at the curve of the message. A Pink ribbon at the top corner with the flower completes this card.
Please continue to my early post today for another card I posted.
Catch the Frenzy!
Be Happy
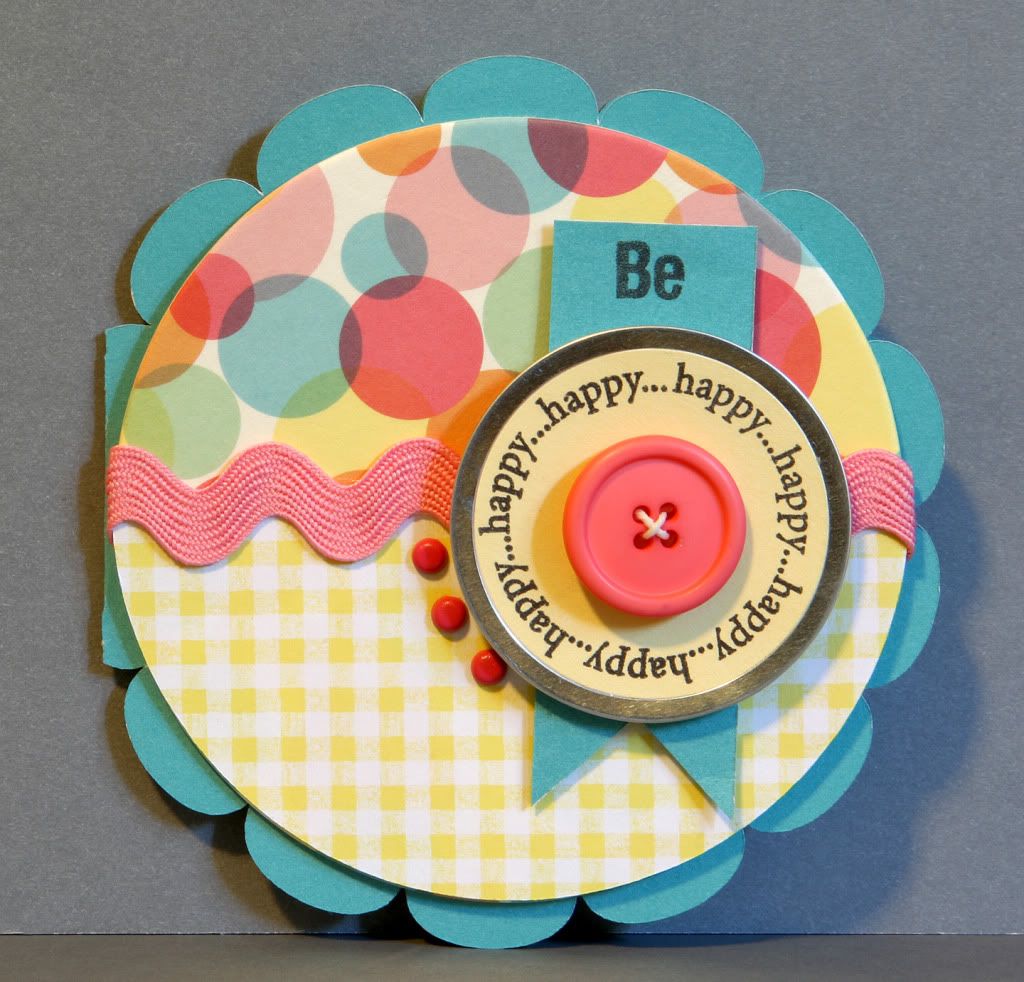 I am really drawn to bright colors, so when I saw a package of paper coasters by Martha Stewart Crafts with bright Pinks, Yellows and Teals I just knew I needed to purchase them. There were 12 in the package on sale at Michael's 40% off. I love making round cards as well, so needless to say, when I saw the weekly challenge at Mojo Monday I knew I was going to somehow use these paper coasters. Here's my creation based on the challenge below. I am also teaching a class on Monday night with some close friends, I think they are going to like this card and I hope you will too.
To make this card:
5" x 5" Teal colored cardstock for base of card
4" paper coaster or other pattern paper
Half of a 4" circle in coordinating paper
1" x 3" Teal cardstock
1-3/4" Yellow cardstock circle
(All my paper from Close to My Heart)
Cartridges used:
Wild Card page 52 <Doily> cut at 4-1/2" using the blackout feature
To complete this card:
After cutting the base of the card adhere the half circle pattern paper over the coaster. Next I attached Pink ric rac with adhesive in the center, covering the edge of the pattern half circle. Tuck the ric rac behind the coaster. I stamped the Happy... message on the Yellow cardstock and then punched it out using the 1-3/4" circle punch. Adhere this piece to the round metal tag. For the Teal tag, I used a 1" square punch to make the banner, stamped the Be message at the top. Before you adhere all pieces together, make sure to mark the location for the brads with a light pencil mark. I used a piercing tool so it would easily go through the coaster. Add a button in the center of the metal tag. Adhere all pieces together working back to front as shown in the photo.
Catch the Frenzy!
Subscribe to:
Posts (Atom)