
Clay Pot Pumpkins
This project is quick and easy to make. Its prefect for a hostess gift, home decor, centerpiece of use the small one for place card at a table.
I started with 3 clay pots in the following sizes, 4", 3" and 2.5". You can decide which size you would like to make. If you are only making one, the directions are the same, the only difference would be the size of paper strips you would be using for each size clay pot.
 Next find coordinating paper you would like to use for your project. I used 3 sheets from Bo Bunny cutting 4 strips from each sheet. Cut the paper as follows:
4" pot - cut 12 strips at 1" x 7" (four of each pattern/color)
3" pot - cut 12 strips at 3/4" x 5" (four of each pattern/color)
2.5" pot - cut 12 strips at 1/2" x 4" (four of each pattern/color)
Also you will need 2 circles for each pot as follows:
4" pot - cut two 2" circles
3" pot - cut two 1-3/4" circles
2.5" pot - cut two 1-1/2" circles
If you would like to add leaves to your finished project, cut three for each pumpkin as follows:
4" pot - cut three leaves at 2.5"
3" pot - cut three leaves at 2"
2.5" pot - cut three leaves at 1.5"
 Stamp the Turkey image with Memento Tuxedo Black ink. I colored the turkey with my Copic markers int he following colors:
E21, E33, E35, E098, R02, RV42, YR00, YR04, YR07, Y02, Y08, Y17. I also used my blender and white opaque for hi-lights in the eyes.

For the leaves, I used a fine tip sharpie to add doodle lines around the edges and white opaque for hi-lights.
 Using Glue Dots, apply a glue dot to the back of each strip. Attach that strip to the inside of the pot as shown in the photo. To keep the spacing more accurate, work by placing the first four strips with same pattern around the pot in quarter sections. Add the remaining strips around the pot.

It will look like this when all the strips have been applied. Adhere one of the circles to the inside bottom on the pot.

Now add Glue dots to the backs of the strips at the bottom and bring them down and adhere to the bottom of the pot as shown in the photo at right. Continue until all strips are attached to the bottom of the pot.
 To finish of the 4" pot, I like to glue a circle to the bottom of the pot. I also like to add ribbon or ric-rac to the inside of the pot to cover the paper strip edges for a more finished look. And last, I add a plastic drinking glass inside the pot to hold the candy.

Glue three leaves together, tie raffia bow and add a decorative button to the center of the bow.


Swing Up Arm Card
 For the base of this card I started with 2 pieces of white cardstock cut at 3-1/2" x 7". Score both pieces at 1-1/2" and again a 2-1/2". Lay these two pieces on the table with the scored ends as shown, folding one up as a peak, the other as a valley. For the pop up tab piece, cut at 2" x 2 1/2". With this piece laying on the table in front of you, you are going to score at the bottom left corner, creating a triangle. Fold the tab back. (See the 4th photo).
This project is quick and easy to make. Its prefect for a hostess gift, home decor, centerpiece of use the small one for place card at a table.
I started with 3 clay pots in the following sizes, 4", 3" and 2.5". You can decide which size you would like to make. If you are only making one, the directions are the same, the only difference would be the size of paper strips you would be using for each size clay pot.
 Next find coordinating paper you would like to use for your project. I used 3 sheets from Bo Bunny cutting 4 strips from each sheet. Cut the paper as follows:
4" pot - cut 12 strips at 1" x 7" (four of each pattern/color)
3" pot - cut 12 strips at 3/4" x 5" (four of each pattern/color)
2.5" pot - cut 12 strips at 1/2" x 4" (four of each pattern/color)
Also you will need 2 circles for each pot as follows:
4" pot - cut two 2" circles
3" pot - cut two 1-3/4" circles
2.5" pot - cut two 1-1/2" circles
If you would like to add leaves to your finished project, cut three for each pumpkin as follows:
4" pot - cut three leaves at 2.5"
3" pot - cut three leaves at 2"
2.5" pot - cut three leaves at 1.5"

E21, E33, E35, E098, R02, RV42, YR00, YR04, YR07, Y02, Y08, Y17. I also used my blender and white opaque for hi-lights in the eyes.

For the leaves, I used a fine tip sharpie to add doodle lines around the edges and white opaque for hi-lights.


It will look like this when all the strips have been applied. Adhere one of the circles to the inside bottom on the pot.

Now add Glue dots to the backs of the strips at the bottom and bring them down and adhere to the bottom of the pot as shown in the photo at right. Continue until all strips are attached to the bottom of the pot.
 To finish of the 4" pot, I like to glue a circle to the bottom of the pot. I also like to add ribbon or ric-rac to the inside of the pot to cover the paper strip edges for a more finished look. And last, I add a plastic drinking glass inside the pot to hold the candy.
Glue three leaves together, tie raffia bow and add a decorative button to the center of the bow.
To finish, glue dot three leaves together. Add a raffia or other bow and decorate button to the center of the bow. For the small 2.5" pot I added the turkey image to the front, which would be great for a place card for a dinner party. Fill the pot with candy and enjoy!


****************************************
Swing Up Arm Card
 For the base of this card I started with 2 pieces of white cardstock cut at 3-1/2" x 7". Score both pieces at 1-1/2" and again a 2-1/2". Lay these two pieces on the table with the scored ends as shown, folding one up as a peak, the other as a valley. For the pop up tab piece, cut at 2" x 2 1/2". With this piece laying on the table in front of you, you are going to score at the bottom left corner, creating a triangle. Fold the tab back. (See the 4th photo).
 Now you can be creative and decorate the front of the card and the pop up tab. Make sure to stamp the sentiment on the pop up tab at the top on paper, leaving approximately 3/4" unused at the bottom.

The last step is to glue the pop up tab into place. Make sure you have your message at the top. The score is at the bottom left and you have folded it back, This triangle portion is glued to the inside left, about 1/8" away from the front piece and almost flush with the top.

Now hold onto both sides and pull out. The pop up tab should swing up. Make adjustments if needed. Sometimes I just lay the tab inside when the card is fully extended and press the front into the glued triangle to get the right placement.
Please note that you can make this any size you want by adjustment the measurements.
If you have any questions, please email me at stampinQT@comcast.net
****************************************
Up-cycle Project Using Soup Pull Tabs
The project I am sharing today for the Made Especially For You Thursday Craft 'n Chat is tags
Not just any tags, but tags using an interesting little embellishment
I was first introduced to this little embellishment by a fellow DT member at Colorful Creations
The first time I used this little embellishment was for a up-cycle project I made for a Blog Hop
It's the little pop top tab on a can of soup, vegetables or pop can
I had so much fun making a tag for the FCCB - "Save the Earth" Cricut Crawl in April
I received many positive reactions to my tag and clever use of the pop top tab
I hope you will be inspired to save those tabs and create a project of your own

A list of supplies needed to create my tag sample:
I used recycled cardboard for the base of my tag
I used a recycled checked shopping bag for my background paper
You can also use wrapping paper, bags, junk mail or other paper you have on hand
You will also need:
Scissors, paper trimmer, 1-3/4" circle punch, small 1/2" circle punch and a tiny hole punch
Adhesive, medium glue dots, sponge dauber, distress ink, sentiment stamp
a die cut image and background for underneath ( mine is from Elegant Edges/Cricut cartridge)
Embellishments:
Jute, pop top tab, 3 flowers, large brad, 3 tiny buttons, chipboard butterfly

Trim your cardboard base to 3-1/2" x 6-1/2", as well as the background paper
Punch out a coordinating piece of cardstock using the 1-3/4" circle punch - cut in half
Cut a small 1/2" circle out of coordinating cardstock, to cover the lower part of the tab

Adhere the background paper to the cardboard
Adhere the large half circle to the top center of the tag
Using a glue dot, adhere the 1/2" circle into the lower part of the tab
This step is to cover the ragged edges of the tab
Using the tiny hole punch, punch through the layers on the tab and cardboard
Attach a large brad to the center of the tab

Using the sponge dauber and distress ink, sponge around the edges, stamp the sentiment
I also used the edge of the ink pad and lightly pressed onto the oval for some distress lines
Adhere the front and back of the die cut together

Adhere the die cut onto the tag and add the embellishments as shown in the photo
I hope you enjoyed today's project
and
have been inspired to use this unique embellishment on your next project
Scroll down for a few more samples


Thanks for reading my tutorial
Catch the Frenzy! - Karen
****************************************
Folded Envelope with Card

I then cut two sets <Stamp-s> page 37 from the Elegant Edges cartridge, two at 2" red cardstock, the other cut two at 1-1/2" pink gingham pattern paper. One set for the decorative flap and the other set for the inside card holder. I also have two 1" x 9" pink gingham pattern paper strips that a wrapped around the envelope to hold side flaps in place, and repeated idea on inside card holder.
To complete this card:
I used black ink to stamp the "Sending you Love!" message (CTMH) on white square and marker to ink on the word "Love!" only for the inside card holder piece. My two little cherubs (CTMH) were colored and shaded with my Tombow markers (I so want to purchase some Copic markers soon), cut out the cherubs, extra wings and arms for dimension. Layer all pieces as shown in photo. Only adhere the top portion of the stamped Cricut cut to the flap. For the inside gift card holder I adhered a small envelope I had in my stash for goodies. I punched the top with a circle punch so it would be easier to pull out the gift card. For finishing touches I added a heart punch to the inside gift card holder, red baker twine bow with button and glossy ac
cents to the wings and tint hearts in message.
How to make the envelope card:
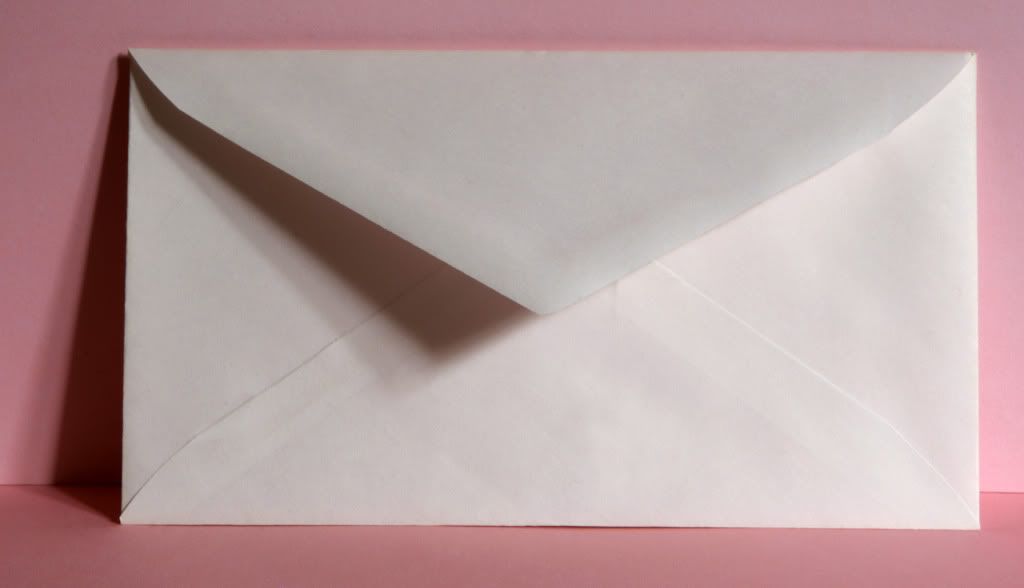
- Use a 3-1/2" x 6-1/2" envelope
- Random stamp the front and back

- Keep envelope flap open
- Fold sides into center
- Crease sharply
- Open envelope back up
- Cut along fold line to top of envelope
- Adhere the cut flap down to envelope back
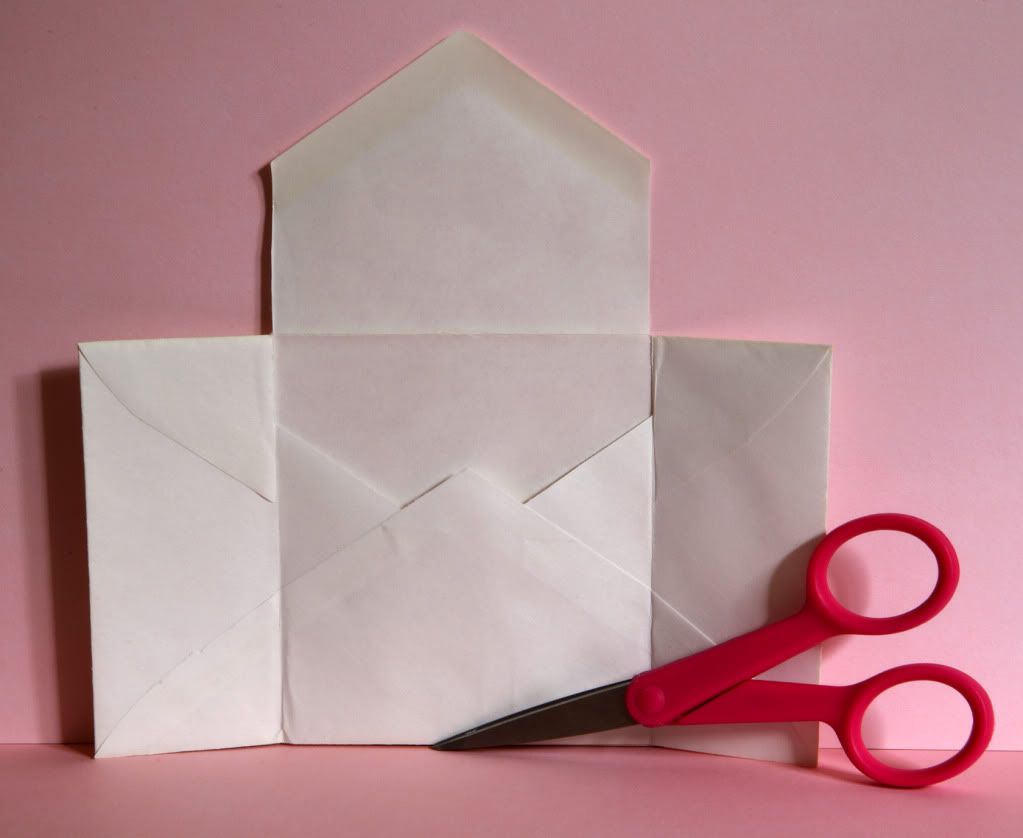

- Finished folded envelope gift card holder
- Decorate as desired
I love your tutorial!! Please keep them coming.
ReplyDeleteI just signed up as an email follower.
dmcardmaker (at AOL dot com)