Showing posts with label George and Basic Shapes. Show all posts

Tuesday, April 1, 2014

Side Step Card

This month at Technique Time Tuesday we are bringing you the Side Step Card
If you haven't had a chance to make this card, I encourage you to play along with us this month
This technique is really fun to do and you can be really creative with your card
You will find a wonderful video tutorial by Mynnette on the blog,
along with the measurements you will need
Here's my card...
  
To make my card I used kraft cardstock, cutting and scoring using the measurements in the tutorial
Solid cream and navy cardstock are scraps from my stash
My designer paper is from a 6 x 6 paper pack by Authentique called PRIDE
Sentiment from Jaded Blossom - Bless the USA inked with Outdoor Denim and Cranberry
Cricut - Ultimate Creative Series Sampler cartridge used for the solider cut at 3-1/2"
I also used George and Basic Shapes cartridge for the stars, cut at 1" and 2"
I gave it a little SPARKLE by adding red adhesive rhinestones
And finished the card with a star and red button tied with navy floss


Make sure to check out the rest of the INSPIRATION by the other Design Team members
Watch the Tutorial, Gather your supplies and get CREATIVE!

I am looking forward to seeing what you come up with for you SIDE STEP CARD

Thanks for coming by today - Catch the Frenzy! - Karen >^..^<


Tuesday, February 4, 2014

Thinking of You

Today I have a new card showcasing our monthly technique at Technique Time Tuesday
 
We have been playing around with the Shaving Cream Technique
 
What a lot of FUN
It's been years since I made a card using this technique for my background
I hope you will give it a try and make sure to check out the TUTORIAL on the blog
As well as the rest of the Design Team wonderful creations for some inspiration
 
Here's my card...

 
I used Tim Holtz Distress Ink re-inkers in the following colors:
Worn Lipstick
Dusty Concord
Broken China
 
I started with a White A2 card with teal CS layered on top
I trimmed my Shaving Cream paper into a 2" x 5" panel
Added sentiment using black ink on a white oval shape
Which was cut from my Cricut cartridge - George and Basic Shapes
 
To finish the card:  
3 teal flowers with Basic Grey Candy Buttons in the center
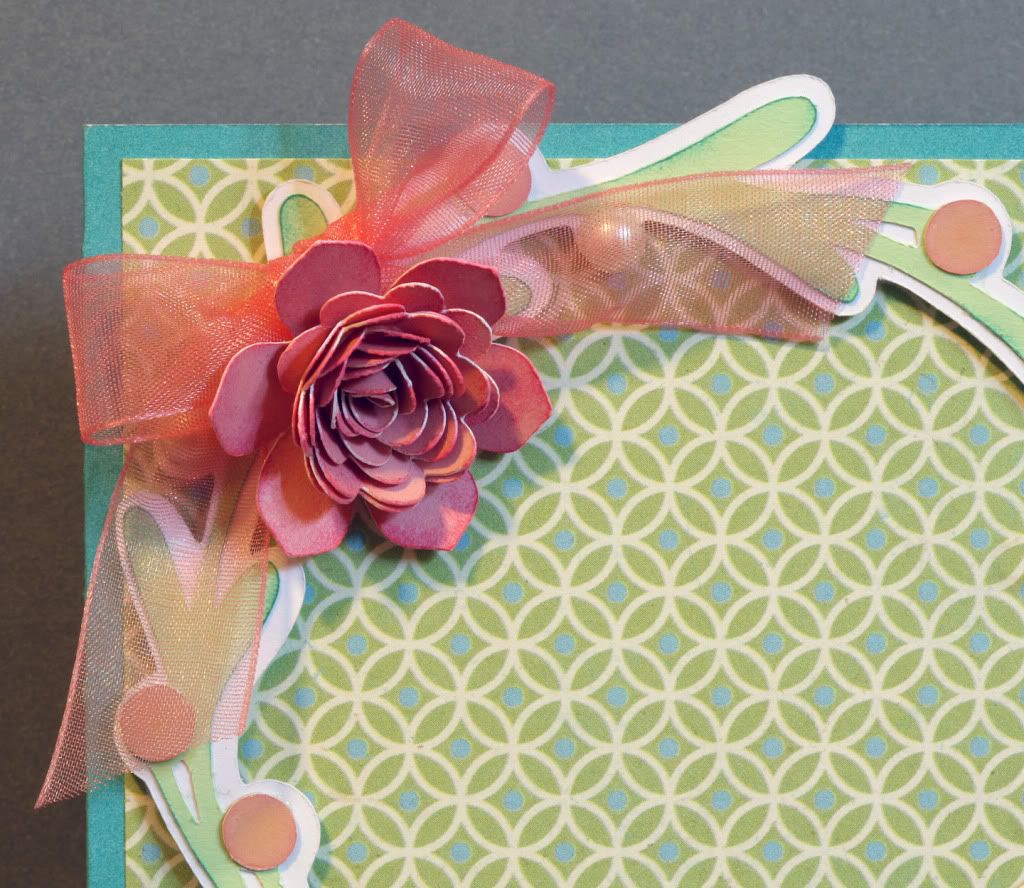
And a Pink ribbon bow at the fold
 
Thanks for stopping by today...
I hope you will play along this month and show us your Shaving Cream creations
 
Catch the Frenzy! - Karen

Tuesday, January 14, 2014

Sketch Time with Try Stamipin' on Tuesday

Back today to share my Design Team card for Try Stampin' on Tuesday
 
TSOT Team B has another great sketch to inspire you this week
(see sketch below)
 
Here's my card inspired by Sketch #151 and the TWIST: Love Plaid
My card ended up being a Masculine card - which is the perfect theme for using plaid
 
 
Start with an A2 Kraft cardstock base, layered with some really old speckled cardstock in my stash
I cut a 2-1/2" Star from the kraft cardstock using my Cricut - George and Basic Shapes
Twine wrapped around the card and added to a wooden button, placed in the center of the Star
My plaid papers, rhinestones and paperclip were from a Recollections embellishment pack
I purchased several packs, with different themes about 1-1/2 years ago
They were hiding in the $1.00 bin at Michaels and I knew one day I would find a use for them
 
 I really enjoyed using this sketch this week...it has many possibilities!
 
Sketch #151
 
Remember to check out the other DT cards from Team B and get inspired
I hope you can make time this week to play along...I would love to see what you come up with
 
Thanks for stopping by today - Happy Tuesday
 
Catch the Frenzy! - Karen

Tuesday, May 21, 2013

#119 at Try Stampin' on Tuesday

It's Tuesday and that means another sketch for you to try over at Try Stampin' on Tuesday
 
I am going to need to make this post a quick one for today, as I am exhausted and need to head to bed
 
Here's my card....

Used A2 Kraft cardstock for the base
Pattern Paper from My Minds Eye 6 x 6 pad - Springtime
Oval from cut from Cricut cartridge - George and Basic Shapes cut at 3-1/2"
Sentiment from The Crafts Meow using Chocolate ink
 
Now it's your turn to create something with sketch #119 as your inspiration
 
 
Also, check out the rest of the Design Teams creations on the blog for some more inspiration
 
I'll be back on Friday with a new card for The Digi Haven Design Team
 
Until then, have a great week - Karen


Monday, May 6, 2013

#61 for Tammy's Scrapin' Corner

Happy Monday! 
I have two posts today, the first one is for my DT creation for Tammy's Scrapin' Corner
 
Our theme this week for challenge #61
Mothers Day
 
My mother unexpectedly and suddenly passed away last year on Mother's Day
This week is going to be rather different and difficult for my family
May 10th would have been her birthday
Sunday is our first Mother's Day without her
Monday 13 is the 1st anniversary of her passing
 
But, she loved that I have a passion for creating and making cards
And she had a passion for flowers and gardening
So this BRIGHT and CHEERY card is for you MOM, I miss you and love you
 
 
Image is called Flowers from QKR Stampede, who is one of our sponsors this week. 
You can find it HERE
 
 
and our other sponsor... Digi Stamp Characters
 
 
I used the following Copic markers to color this image:
R11, R27, R29, RV02, RV21, RV23, Y11, Y15, Y17, YG06, YG23, G07, Colorless Blender
Paper from Echo Park 6 x 6 Paper Pad - For the Record 2
Oval from Cricut cartridge "George & Basic Shapes" - page 114 <oval1> cut at 4"
Scallop edge from Cricut cartridge "Just Because Cards" page 42 <Truck-s> cut at 5-1/2"
Finishing touches:  a red ribbon/bow, sentiment attached with a safety pin,
Buttons for flower centers with white floss, added red bakers twine bow and adhesive pearls
 
Check out the inspiration on the blog from the rest of the Design Team
Create a special card for your Mother and share it with us
I cannot wait to see what you come up with
 
My inspiration is a sketch by Sweet Stop Sketches
 
 
Which I'll be entering my card into that challenge along with the following:
 
 
Thanks for stopping by and make sure to check out my Scrappy Frog post HERE as well
 
Catch the Frenzy! - Karen


Tuesday, April 23, 2013

#115 for Try Stampin' on Tuesday

It's Tuesday and we have an awesome sketch for you today - #115 at Try Stampin' on Tuesday

I am still trying really hard to clear it out and use what I have on hand
And I really needed to make this card sample quick and keeping it simple for my post
This is what I came up for my card this week..

 
I really like how it turned out - below is the sketch
 

4-1/4" x 5-1/2" stamped up piece of cardstock with this wedding background message from CTMH
I decided to cut a 3" circle out of this piece using my Cricut-George & Basic Shape cartridge
I dug through a box of cut Cricut images that I just have not used and found the Bride/Groom
Bride/Groom was 2-1/2" Real Dial size from the Wild Card cartridge
Banner and layers of paper all from my stash
Pattern paper from 6 x 6 paper pad - Memory Box - Viola
To finish the card - I used some jumbo lavender brads from my stash

Make sure to check the rest of the Design Teams creations/inspiration on the blog
I sure hope you will have a chance to join us and share what you have made

Thanks for stopping by today - Catch the Frenzy! - Karen

Sunday, February 3, 2013

L O V E and new DT

I am now a new DT member at Scrappy Frogs Challenge Blog

Scrappy Frogs offers a variety of challenges for everyone.
The Challenges are posted 1st Monday of the month - 2/4/13 starts our PINK and RED challenge.
Scrappy Frogs a place to challenge yourself, be inspired, as well as a place to just have FUN!

Here's my PINK and RED card for the challenge with KRAFT


To make my card:
Start with an A2 Kraft cardstock base - cardstock from My Favorite Things - found HERE
Designer Paper 12 x 12 paper pad from K & Company - Valentine by Kelly Panacci
For scalloped edge - Cricut cartridge - Just Because Cards page 42 <Truck-s> cut at 4"
For hearts - Cricut cartridge - George & Basic Shapes page 119 <heart2> cut at 4", 3-1/2', 2-1/2"
Sentiment from My Favorite Things - Homespun Hearts - found  HERE
Tuxedo Black ink - Memento
 
My finishing touches:
Pink ribbon and bow, pink adhesive rhinestones, banners and scrabble wooden letters
L O V E
 
So please join me and the rest of the Design Team for this months challenge at Scrappy Frogs
 
PINK and RED
 
I look forward to seeing what you create.  Thanks for stopping by today.
Catch the Frenzy! - Karen
 
I am also entering this card in the following challenges:

Polka Doodles - Week 5 - Lots of Layers + Pink and Red
My Time to Craft - #207 - Love is in the Air
My Sheri Crafts - #103 - Valentines
Dynamic Duos - #38 Real Red and Pretty in Pink

Monday, July 23, 2012

Challenge Me Monday

This week at Fantabulous Cricut the Design Team members on Team A
are sharing their inspiration for Challenge #121 - Wedding Bliss.

Make a project for a special couple, (Wedding or Anniversary).
Use at least one (1) Cricut cut on your project.
And remember to list on your blog the cartridge(s) used.

I have to admit, I do not have many cartridges with Wedding images.
I did find an image in the Wild Card Cartridge.
Page 63 <Cake) using the Icon feature, cut at 3-1/2".

I was able to create a simple, but elegant card with this image.
I love Red, Black and White together.


I also used George & Basic Shapes cartridge, page 108 circle. 
White circle cut at 4"  and the Black with white polka dots cut at 1-1/2"
Sentiment is from Close to my Heart.
All other supplies were from my stash.

I hope you will be able to play along with us this week at FCCB
Challenge begins on Monday, July 23 and runs through Midnight (Mountain Time), July 29
Have a great week.

Catch the Frenzy! - Karen

Saturday, May 19, 2012

New Baby

A little late with my sharing for the Fussy and Fancy Challenge, Challenge #63, New Baby.  But here it is.  "Oh Happy Day".  My very first card as a DT member at Fussy and Fancy.  Still learning to color with my Copics, but enjoying using them.  I find coloring to be very calming.

To make this card I used pattern paper from a Miss Caroline - Dilly Dally 6 x 6 pad.  All solid card stock is from Close to My Heart.  My sentiment is from Impress and the cute little elephant is Bubba the Elephant from Memory Box.

I used the following Cricut cartridges:  George & Basic Shapes, page 108, <circle>, cutting two 2-1/2" on white.  Cut one in half.  Elegant Edges, page 65 <Flwers-s> cut at 3" on yellow.  Just Because, page 46 <Apple-s> cut two at 5-1/2" in yellow for the scallop edge.  I also cut banners and trimmed the ends with a square punch.

Finishing touches include doodles along edges, hanging the banner on a piece of red/white bakers twine and brads.  Thank you for stopping by today.

So head on over to Fussy and Fancy Challenge and check out all the inspiration from our Design Team.  I hope you will have a chance to play along with us as well.

Thanks for stopping by today.

Catch the Frenzy!

Tuesday, May 15, 2012

Tu Tu Cute

Today's share is a card I made for Fantabulous Cricut Challenge Me Monday #111.  The challenge is to make a project using a tux/dress or prom/dance theme.  The Design Team has some fabulous project to share, so please stop by this week and play along with us.

My card today features a pink and kraft color combo, which is fun to work with.  I used a digi image from Bugaboo Stamps, colored her in with the following Copic markers.

E00, E02, E21, E33, E35, RV10, RV21, RV23

I used the following Cricut cartridges:  Just Because, page 42 <Truck-s> for the scallop edge cut at 5".  George and Basic shapes the cut the numbers and letters, cut at 1"

Layer all pieces together as shown in the photo, working back to front.  I trimmed the paper I used for the numbers with a square punch to make banners.  For the finishing touches, I added two flowers, layered and pink adhesive rhinestone to the center.  I also added same rhinestones to the banner and upper edge of pink paper.

Thank you for stopping by today.

Catch the Frenzy!


Saturday, April 14, 2012

Have a Happy Day

My card share for today was one I made for a sketch challenge over at Made Especially for You  based on the sketch below. This was a fun sketch to work with, as there are many possibilities.  I decided to make a whimsical spring card and I hope you enjoy it.


I started with a blue A2 card for my base.  I added three pattern paper strips cut at 1" x 3" and a coordinating pattern paper cut at 2" x 4".  I used my George and Basic Shapes cartridge for <cylnder2> on page 97 cut at 3" using the slotted feature on cream cardstock and shadow feature on blue cardstock.  The sentiments used are from an old Close to My Heart set #D1408 A little of Everything, stamped in Memento's Tuxedo Black ink.


I finished the card by adding flowers with button centers, Doodlebug, Swimming Pool twine, which I used a small safety pin at attach the tiny tag.

Thanks for stopping by today and remember to Catch the Frenzy!

Monday, April 9, 2012

Buttons and Bows

I can't tell you how much fun it is to design for Fantabulous Cricut  and this weeks Challenge Me Monday #106 - Buttons and Bows was no exception. 

The challenge is to add at least one Button and one Bow to your project, but make sure you have at least one Cricut cut on the project as well.  Please stop by and play along with us this week.

My card starts with a 4-1/4" x 8-1/2" piece of bright blue cardstock paper.  I scored this piece at 2-1/8" and at 6-3/8" so when folded it creates a 4-1/4" x 4-1/4" square card.  I then cut 4 pieces of coordinating paper at 1-7/8" x 4" and one piece at 4" x 4".  Bright blue and white cardstock from Close to My Heart, pattern paper from My Minds Eye 6 x 6 pad Fine and Dandy.

I used the following Cricut cartridges:

Elegant Edges, page 65 <Flwer3-s> bright blue cut at 3-1/2" and 1-1/4" (for the inside of card), white cut at 3" and 1" (for the inside of card).  Also cut <Flower3> at 3" from a pattern paper and a 1" piece from the same pattern paper (for the inside of card).  The last cut from this cartridge is  <Flwer3-s> bright blue cut at 2-1/2" using the oblong feature. 

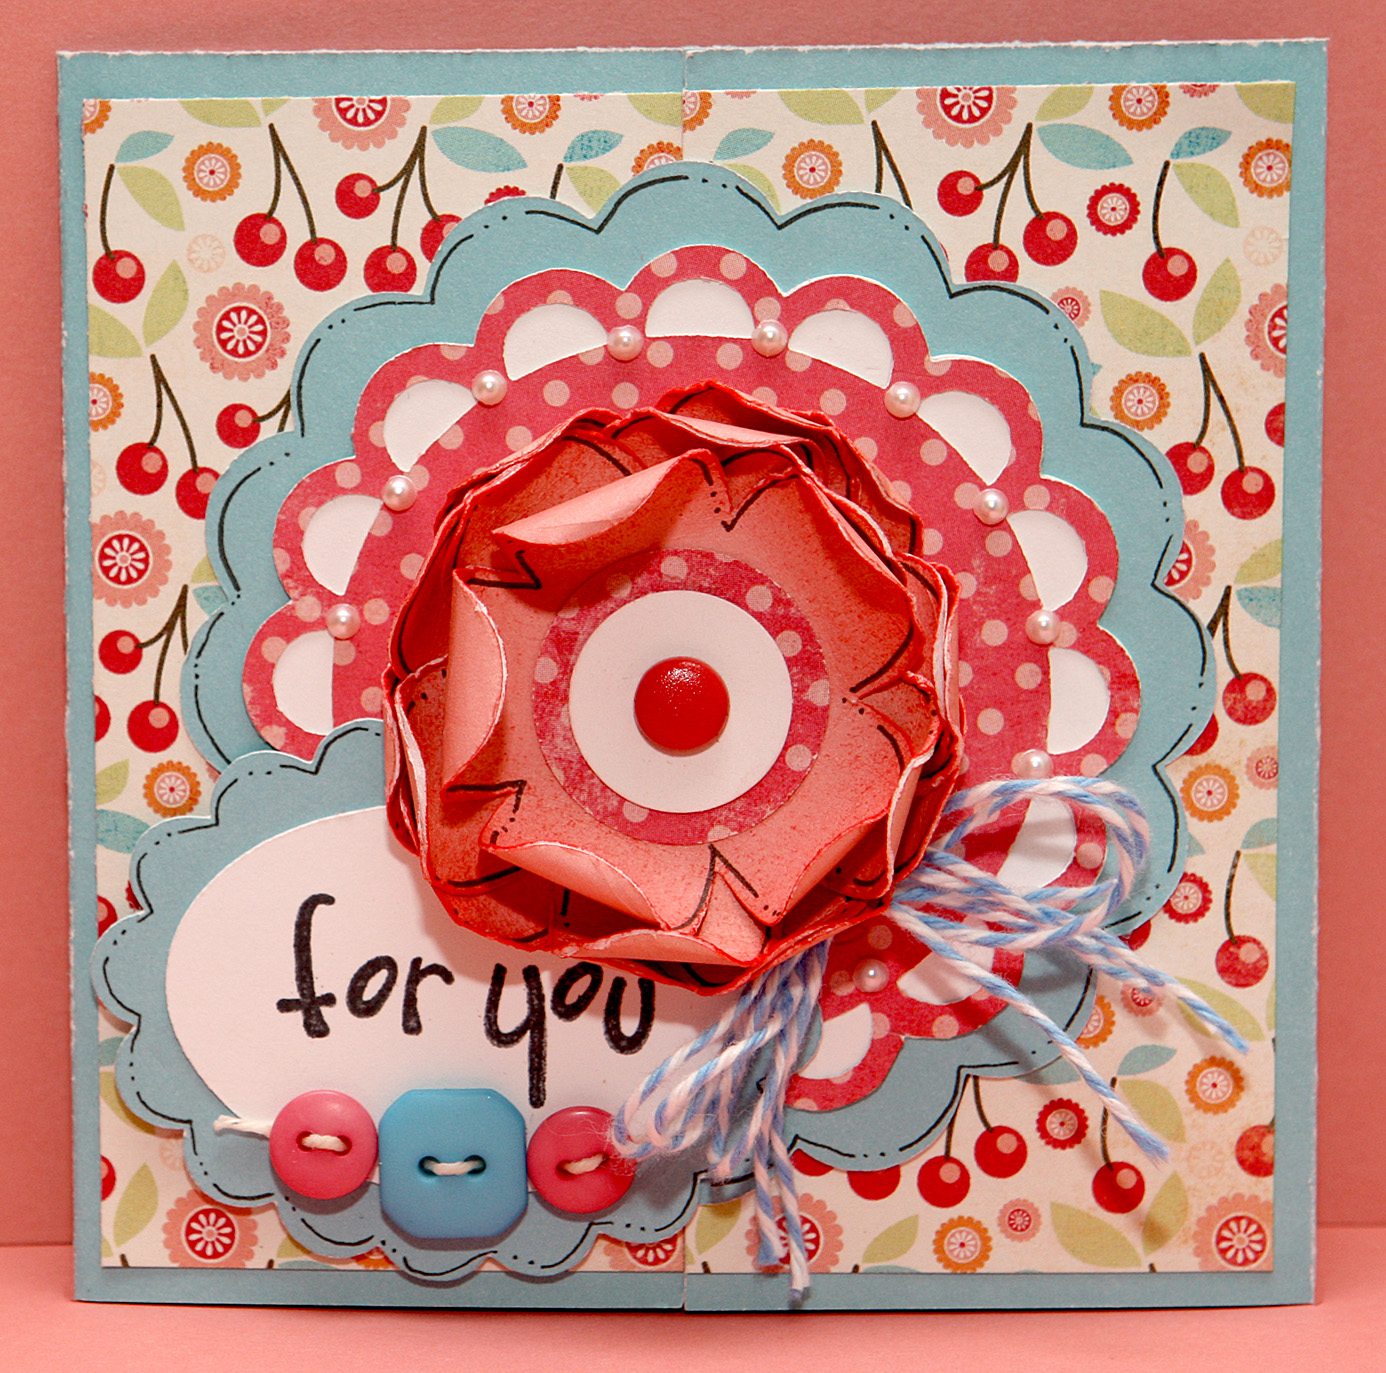
I also used the George & Basic Shapes cartridge, page 114 <oval1> cut on white cardstock at 2".  I stamped the "for you" message onto this piece.  The flowers on the front are from this cartridge as well.  You will find them on page 120, <flower2>, cut five flowers (I used blush cardstock from Close to My Heat) at 2" using the shadow blackout feature.

Because I made an Oops!, I also cut a 1" x 4" white cardstock for the inside "happy birthday" message, which covers my Oops!.

Adhere all layers of this card, working back to front as shown in the photo.  Please note that the scalloped circle is only attached to the left card flap only.

For my finishing touches, I sponged blush ink around the edges of the flowers, distressed and curled the edges,  I then doodled black lines around the flowers and the bright blue scalloped circle and oval.  I added two circle punches and brad to the center of flower, floss through the three buttons, tiny adhesive pearls around the pink scalloped circle and a twine bow, which is swimming pool color from Doodlebug.

Have a Fantabulous week and remember to Catch the Frenzy!

Monday, March 26, 2012

It's Springtime

It was an absolutely gorgeous spring day today in Washington, with sunshine and purple crocus popping up in my yard.  Lovin' it. 


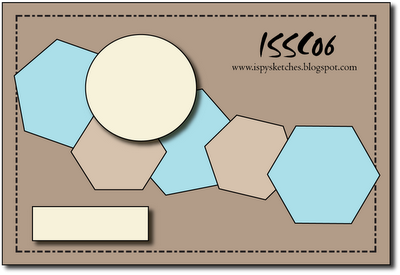
So my card today is one I made for iSpy Sketches  based on the sketch below.  If you have not had a change to check out their blog, please do so.  They have fun sketches to work with and the Design Team creations are very inspirational.

To make my card I used ink, paper and stamps from Close to My Heart that I had in my stash.  I began with an Orchid Bouquet A2 card.  Layered the Indian Corn Blue gingham paper on top.  For the center piece I used Elegant Edges Cricut cartridge, page 65 <Flower3> with the Oblong feature cut at 4", added the shadow in white cardstock.  I also cut a 3" <oval1> found of page 114 of George & Basic Shapes Cartridge.  The bird and birdhouse images were stamped in the same ink colors as the paper.  I also used Clover Meadow for the leaves. 

Finishing touches were adding the green grosgrain ribbon to the right side and a bow at the top.  The "thinking of you" message were stamp with black ink on a white strip of cardstock paper.  I clipped one end with a square punch to create a banner effect.  Small adhesive pearls around the oval really finish this card off.


Thank you for stopping by today. Enjoy your week and check back for more sharing.

Catch the Frenzy!


Sweet little Lamb

My share today is my Design Team creation for Fantabulous Cricut  - Challenge Me Monday #104 "Out like a Lamb".  The basic idea for this card had been developing in my head weeks.  I finally had time to create it last Saturday and I have been waiting to share with everyone.  It was so much fun to make and when I look at it, it makes me go all soft and squishy inside.  I hope it has the same affect on you.

I started with a 7" x 8" white cardstock, folded in half to create a 3-1/2" x 8" card.  I added 1-1/2" x 8" strip of Bubblegum gingham paper at the bottom of the card.  The next layer is a 3/4" strip and a 2" circle Citrus Leaf cardstock, with a 1-3/4" white circle.  Inside this circle I stamped a circle message that says "Cutie...Cutie" and used a second stamp inked in Bubblegum "Hello" for the center.

I used Create a Critter, pg. 71 <Lamb> cut at 4" for all layers.  The tulips are from the same cartridge, pg. 69 <Bttrfly2> using the accessory feature, cut at 3".  George and Basic shapes was used for the 2" Citrus Leaf circle.  The last cartridge I used was Walk in My Garden, pg. 115 <btfly1> cut at 1" using the blackout feature.  I cut a second one in Citrus Leaf and used the body only.

For my finishing touches I used Baby Pink ink to sponge around the white portion of the lamb, Bubblegum ink sponged around the gingham paper on the lamb, tulips, butterfly wings.  Citrus Leaf ink for the leaves, grass and butterfly body.  I added line doodles with my black  .01 micron pen to my cuts outs and the lamb got eyelashes and cheeks with little white dots for her eyes.  Adhesive pearls were added to the tulips, buttons for the lamb and the butterfly head.  And the last touch was the sweet little Limeade baker twine bows added to my little lambs ears.

Catch the Frenzy!

Tuesday, March 13, 2012

Thanks for Everything - ISSC06 Challenge

Another iSpy Sketches Challenge #06 based on the below sketch from Patter Cross.  The Octagon shape was intriguing. Thanks for stopping by today and please stop by iSpy Sketches.

I used My George & Basic Shapes Cartridge for the <Octagon> shape found on pg. 107 and I cut three at 1-1/2" and two at 1" in coordinating colored pattern paper.  I also used this same cartridge to cut my circle, which is found on pg. 108 and cut the red one at 2-1/2" and the pattern one at 2".  The last Cricut cut was the <Flower1>, pg. 120 in which I cut three at 1-1/2".


I stamped the sentiments in Chocolate ink , both from Close to My Heart on the smaller circle, and on white cardstock, which punch to make a banner.  All pieces layered as shown in the photo. 

Finishing touches, added chocolate brads to the center of the three layered flowers, to the right edge of the circle and to the center of my Bon Bon (DoodleBug Design) twine bow.

Catch the Frenzy!

Monday, March 12, 2012

Happy March

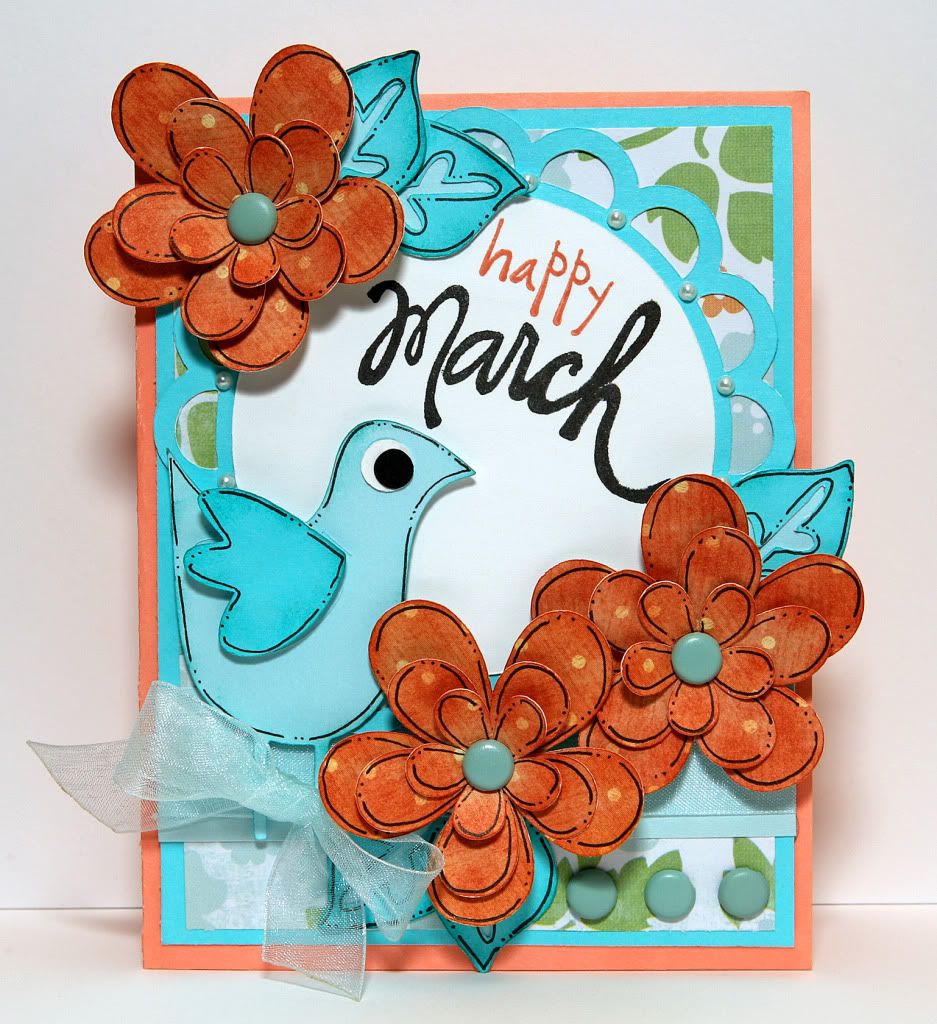
I'm playing along with My Craft Spot challenge #47 - For the Birds.  My card has an awesome color combination of Lagoon and Sorbet and lots of layers.  So Happy March!


I started with Sorbet A2 card.  I added a pattern paper I found in a stack of DCWV with the same Lagoon and Sorbet colors.  I used  the following cartridges for my card:  Elegant Edges pg. 65 <Flower3> cut at 4" for the center piece.  My bird is found in Live Simply <Bird1-s> cut at 3", I also used the layers for the wing and leaves.  The flower is from George & Basic shapes cartridge, pg. 120.  I cut 3 each in the following sizes, 2", 1-1/2" and 1" on dotted Sorbet paper from My Minds Eye.  I also cut the white circle found on pg. 108 at 3".  All other paper from Close to My Heart and cut 1/4" smaller than the piece below it. 

To finish this card I sponged all bird and leaf pieces with Lagoon ink, all flower pieces with Sorbet ink, ink from Close to My Heart.  After sponging I added black line details around the edges of these pieces.  Stamped my sentiment, two stamps from Close to My Heart in Sorbet and Black.  Added lighter lagoon brads From American Craft to center of flowers and 3 at the lower right corner.  Small adhesive pearls around the center cut out and a ribbon finish off my card.

Catch the Frenzy!

Friday, February 24, 2012

Darn it, I missed the deadline!

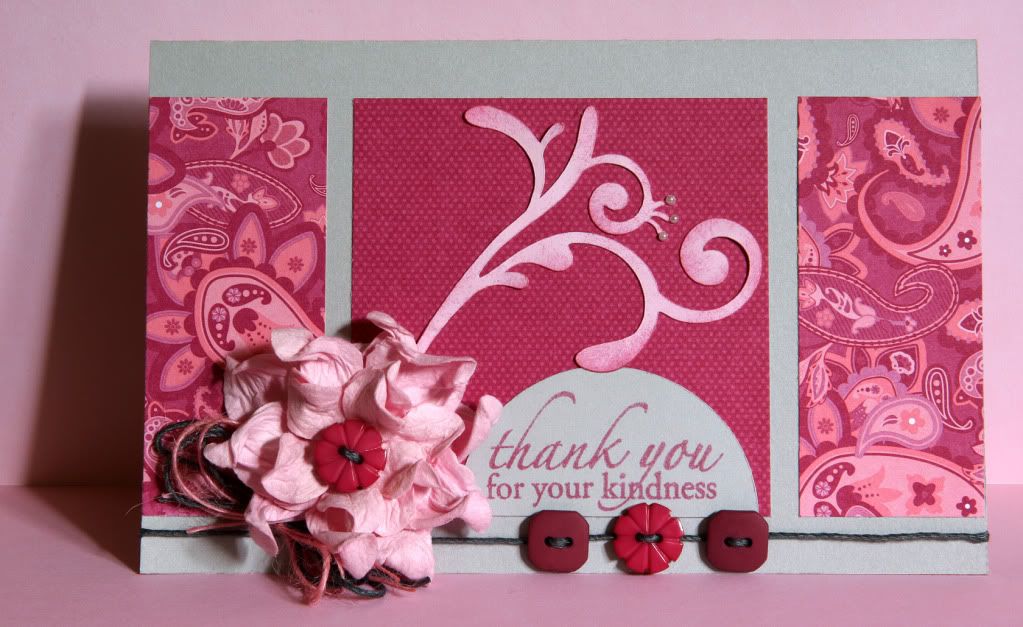
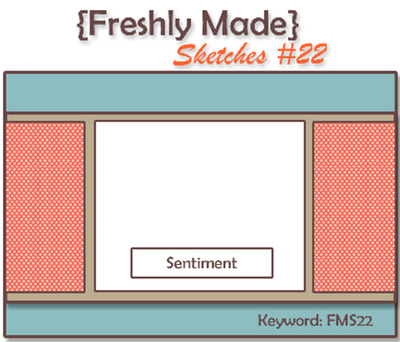
This card was made for the Freshly Made Sketches #22, but Darn It, I missed the deadline to link and play along.  I was sick with a sore throat and low energy and just wasn't clearly thinking?  Oh well!  Anyway, I wanted to make sure to post it anyway so that my followers would be able to not only check out my card, but tall the other wonderful creatures linked at FMS.  So enjoy!


To make this card:

I used a 4-1/2" x 7" grey cardstock for the base.  My pattern paper were cut two ends at 1-1/2" x 3-1/2" and one center at 3-1/2" x 3-1/2".  I cut a grey circle at 2-1/2" from the George and Basic Shapes.

To complete this card:

I used Straight from the Nest cartridge, page 70 <Floursh3> at 3", stamped the sentiment in the grey circle .  I sponged around the flourish, added grey bamboo twine with buttons slipped through.  Added a great pink flower, which I received in a goodie box from The Crafts Meow Shop.  To this flower I added another button and a bow  made with the great bamboo twine and pink fibers I had on hand.

Catch the Frenzy!

Tuesday, February 21, 2012

Whimsical Be Happy

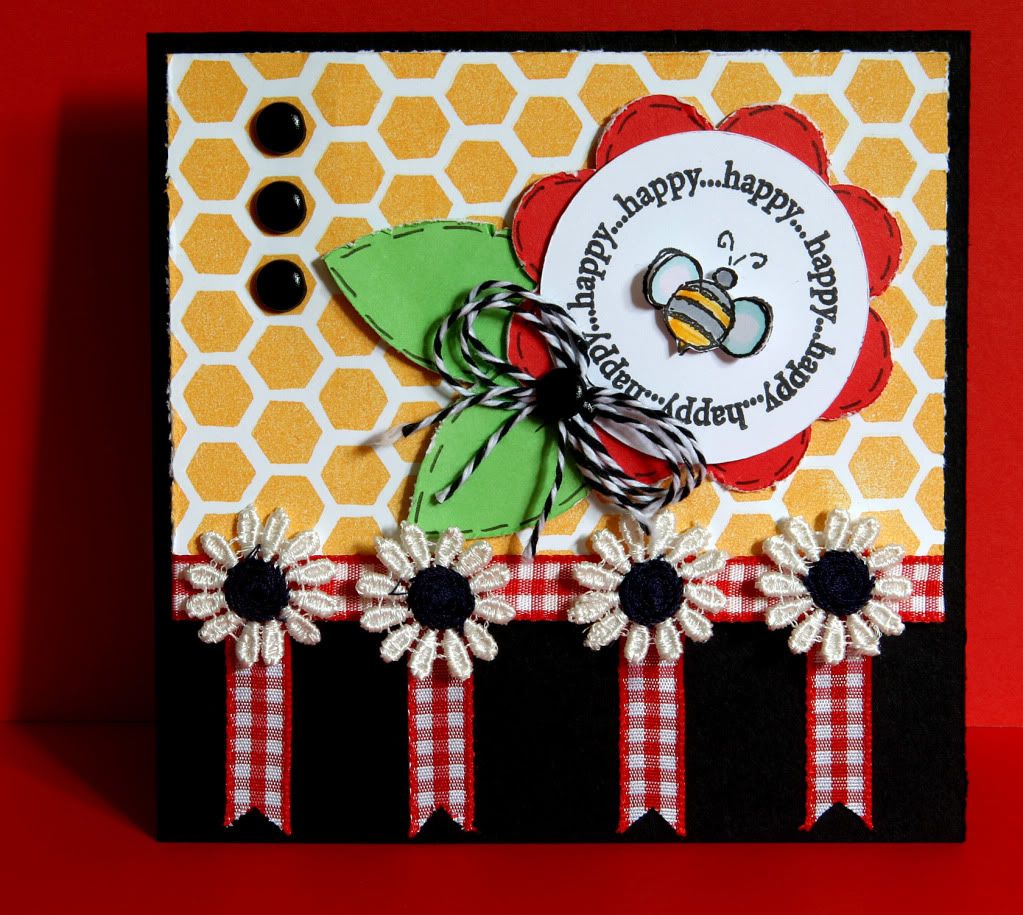
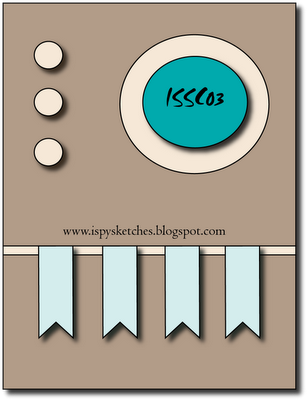
I happened upon this blog iSpy Sketches and so enjoyed their blog with the Special Agent theme, mystery and intrigue.  I love reading and watching mysteries and knew immediately that I wanted to be a part of this challenge.  So this card is for their ISSC03 based on this sketch below.

This card is also being entered in the Cas-ual Fridays challenge CFC #40


To make this card:

I used a 5 x 5 black cardstock base.  As I was digging around in my craft room, I came across a peice of already stamped honeycomb image, that must have been left over from a class I taught many years ago.  So that is what I used.  It was cut down to 3-1/2" x 4-3/4".

To complete this card:

I used the George and Basic Shapes to cut a 2" white circle, Elegant Edges, page 28 <Flower1-s> cut at 2-1/2" in red and the Walk in My Garden, page 109 cut two 1" green <leaf1> using the blackout feature.  I stamped my image and sentiment (both Close to My Heart) on the white circle, colored in the bumblebee with my Tombow markers.  Added pen ink stitches around the flower and leafs.  I distressed all edges, including the honeycomb paper.  My finishing touches include 3 large black brads, red gingham ribbon and banners.  I used some daisies from a ribbon that was in my goodie box I purchased at The Crafts Meow Shop, which has been some much fun!  And last but not least, a black baker twine ribbon bow with a black brad in the center was added to the flower.
So Be Happy and Catch the Frenzy!

Sunday, February 5, 2012

Friends to the end

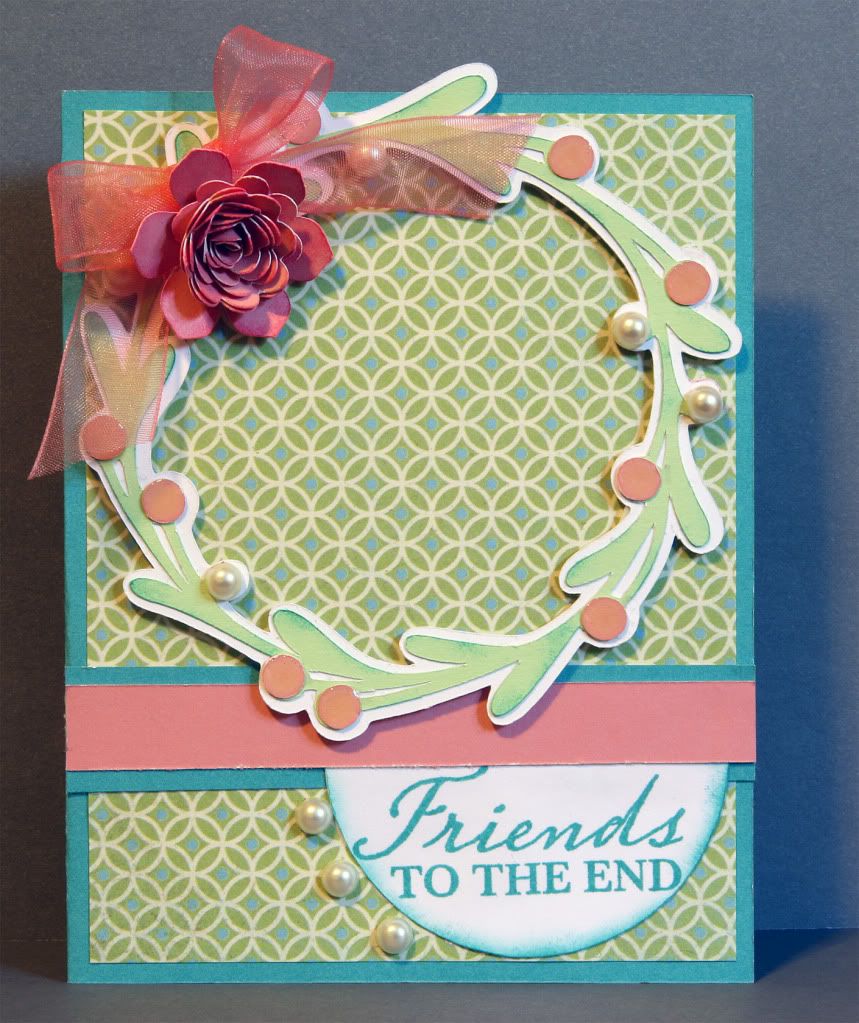
While digging around in my stash of paper, I came across this pattern paper from Close to My Heart.  I do not remember what paper pack it was from, as I no longer am a consultant and I have a lot of paper.  Anyway, I love this color combo and wanted to make something a little more elegant.  This card will be entered in the My Craft Spot Monday Challenge - Anything goes.  Make sure you check out all 3 post today for other card ideas.

To make this card:

A2 Teal cardstock for base of card
4" x 5-1/4" pattern paper
2-1/2" white cardstock half circle
3/4" x 4-1/4" Teal cardstock
1/2" x 4-1/4" pink

Cartridges used:

George and Basic Shapes - page 108 <circle> cut at 2-1/2" white cardstock
Joys of the Season - page 66 <Wreath2> cut a 4" green cardstock, shadow feature white cardstock and layers for the berries in pink cardstock
Flower Shoppe - page 16 <Fun4> and page 13 <Scallop1> both cut at 1-1/2" pink


To complete this card:

Stamp the message on the white cardstock 1/2 circle in Teal.  I then sponged Teal ink around the edges of the wreath and the half circle.  I sponged darker pink around the edges of both flower pieces.  Layer all paper together working back to front as shown in the photo.  For finishing touches I added Glossy accents to the pink berries and adhesive pearls to the wreath, and at the curve of the message.  A Pink ribbon at the top corner with the flower completes this card.

Please continue to my early post today for another card I posted.

Catch the Frenzy!

Saturday, January 21, 2012

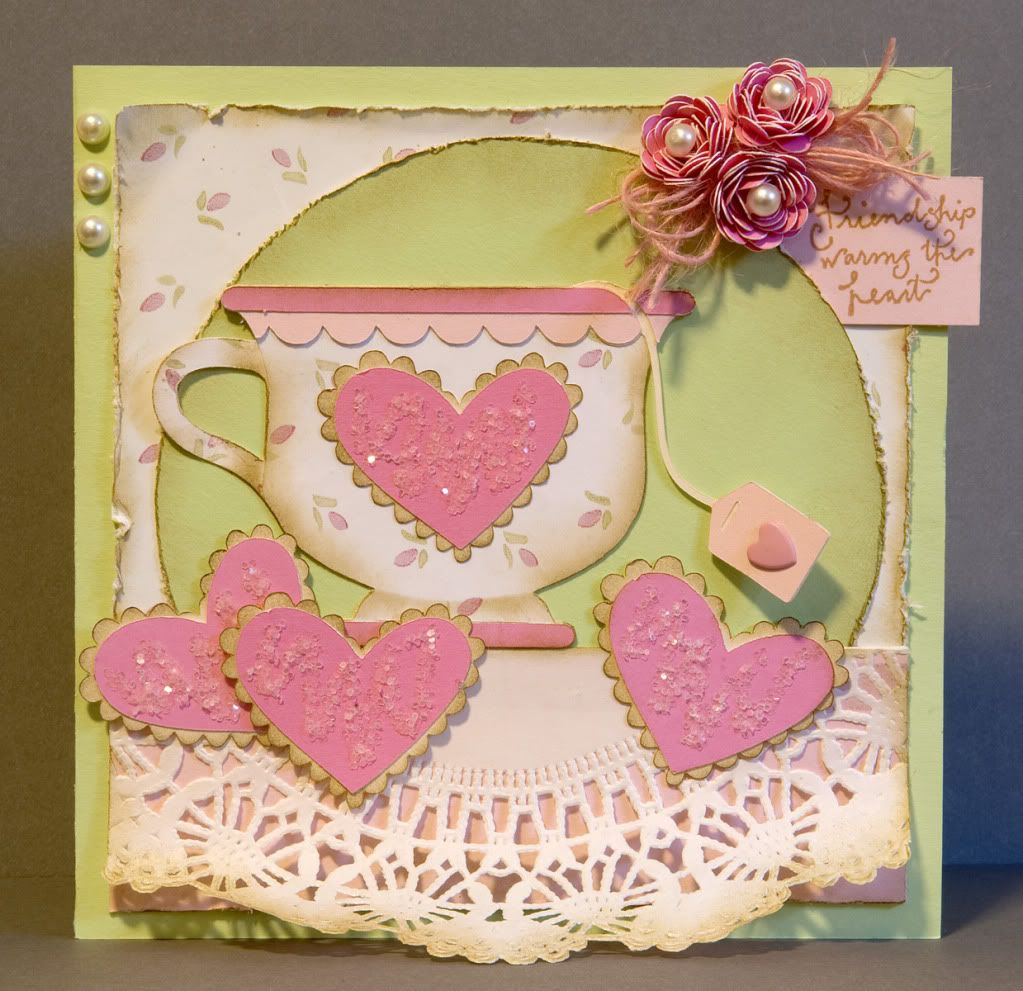
Friendship Warms the Heart

I am so excited, as I was able to get a few cards completed today and enter two of them into weekly challenges. My first two challenge entries as a new blogger!  I was inspired by the Monday Challenge #40 "It's Delicious" at The Craft Spot and this card is my finished piece of work.  I so wanted to use my Love You a Latte cartridge.  I choose to use the Teacup to create my card, which has a Victorian tea party theme, complete with dollies, roses, pearls and pretty pink sugar cookies.  I hope you enjoy it as much as I enjoyed creating it.

This is a 6 x 6 card

I used the following cartridges to create this card:
  • Love you a Latte <Teacup> and all layers 2-1/2"
  • Flower shoppe <Scallop1> 2"
  • Doodlecharms <Heart> 1-1/2" and shadow 1"
  • George and Basic Shapes <Circle> 5"
Other products used from my stash: fibers, adhesive pearls, heart brad, glitter, dollies

Note:  used desert sand ink from Close to my Heart to sponge around the edges after distressing the paper.  Also for the cookie edges to give it that baked look.

Shout Out to my husband, Kurt who is my photographer and always willing to take the photo's I need for my blog.  He is awesome!
Catch the Frenzy!
Related Posts Plugin for WordPress, Blogger...