
Thanks for stopping by today...I have 3 Valentines and one tutorial to share with you
1.) Love bug
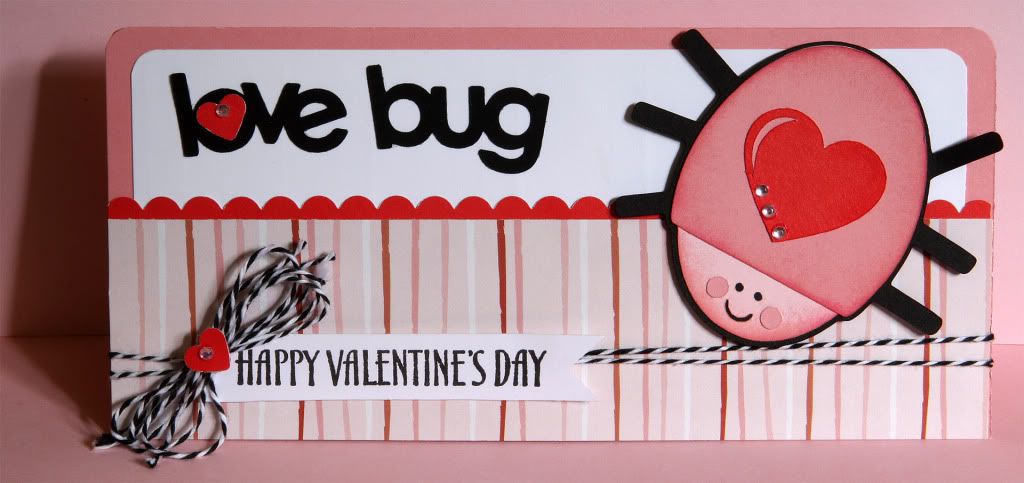
This one makes me smile :) and the colors are one of my favorites together... Black, Red and Pink. This card will be entered in the Fantabulous Cricut Challenge #97 - Love is in the air (use a heart) check out all the other fabulous ideas at on their blog.
 To make this card:
 Start with a pink 7" x 8" cardstock folded in half for the base. I rounded the top corners of the pink base, as well as the white 2" x 7-1/2" piece. Next I trimmed a 8" x 1" piece of red cardstock with my scallop scissors. The piece is striped pattern paper is cut at 2" x 8". All paper is from my stash of Close to My Heart products. Layer pieces together as shown in photo, working back to front.
To complete this card:
I used the Simply Charmed cartridge, page 31 <Lovebug1> cut at 3", all layers, shadow and word. Sponging around the bug in darker pink ink. I stamped the "Happy Valentine's Day" message (CTMH) on white cardstock and clipped the ends with a square punch to make it into a banner. I wrapped black bakers twine (Doodlebug Design, Inc) around the bottom of the card, added a bow, small heart punch to both the bow and the "O" then blinged my love bug and hearts with pink rhinestones.
2.) Sending you love - envelope creation for gift card
This idea is something I have been making for 10+ years when I want to give a gift card to a friend. I haven't played around with the tutorial video idea yet, so I will explain it with pictures below. I will be entering this card in My Craft Spot Challenge #43 Valentine's Day (card or treat packaging).
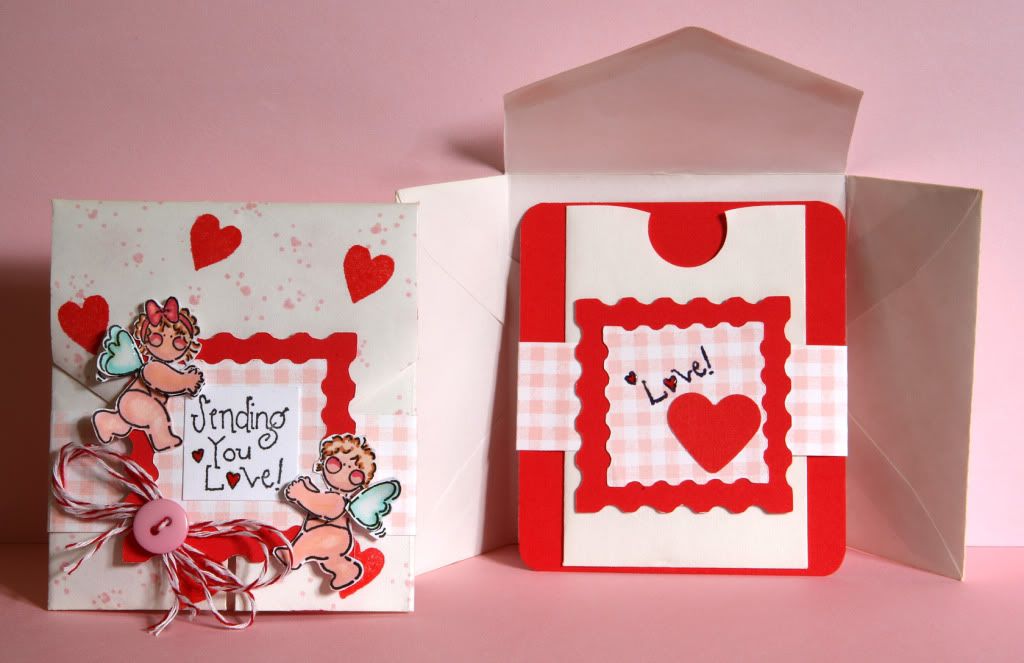
Use a standard 3-1/2" x 6-1/2" white envelope, keep the flap open and random stamp the entire envelope, front and back. I used a really old Close to My Heart background stamp (well love & well used) with a tiny heart cluster pattern with pink ink. I then went back and filled in using a bold heart stamp from Impress with red ink.
I then cut two sets <Stamp-s> page 37 from the Elegant Edges cartridge, two at 2" red cardstock, the other cut two at 1-1/2" pink gingham pattern paper. One set for the decorative flap and the other set for the inside card holder. I also have two 1" x 9" pink gingham pattern paper strips that a wrapped around the envelope to hold side flaps in place, and repeated idea on inside card holder.
To complete this card:
I used black ink to stamp the "Sending you Love!" message (CTMH) on white square and marker to ink on the word "Love!" only for the inside card holder piece. My two little cherubs (CTMH) were colored and shaded with my Tombow markers (I so want to purchase some Copic markers soon), cut out the cherubs, extra wings and arms for dimension. Layer all pieces as shown in photo. Only adhere the top portion of the stamped Cricut cut to the flap. For the inside gift card holder I adhered a small envelope I had in my stash for goodies. I punched the top with a circle punch so it would be easier to pull out the gift card. For finishing touches I added a heart punch to the inside gift card holder, red baker twine bow with button and glossy ac
cents to the wings and tint hearts in message.
Read more on How to make the envelope and to see the third share.
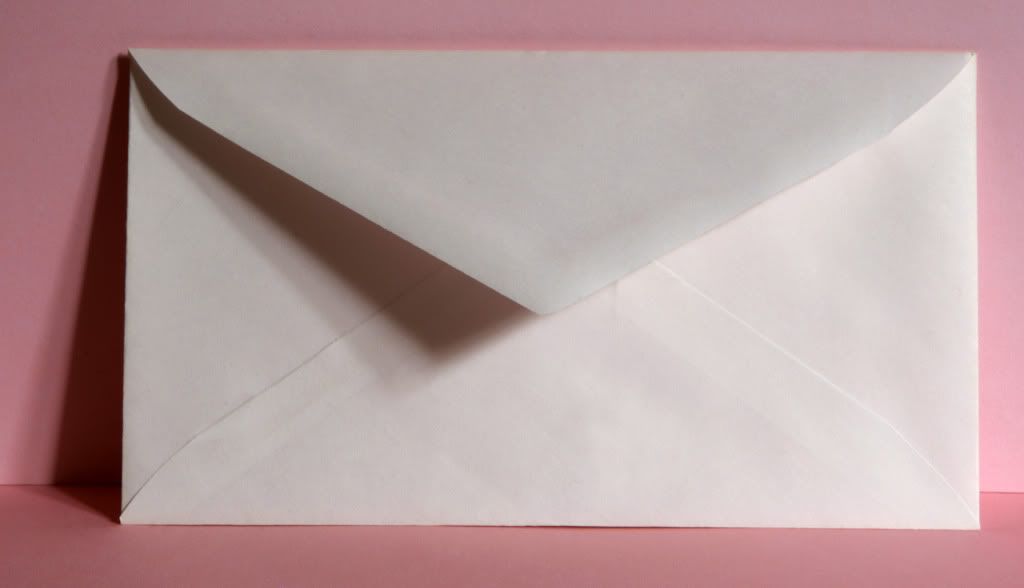
- Use a 3-1/2" x 6-1/2" envelope
- Random stamp the front and back

- Keep envelope flap open
- Fold sides into center
- Crease sharpl
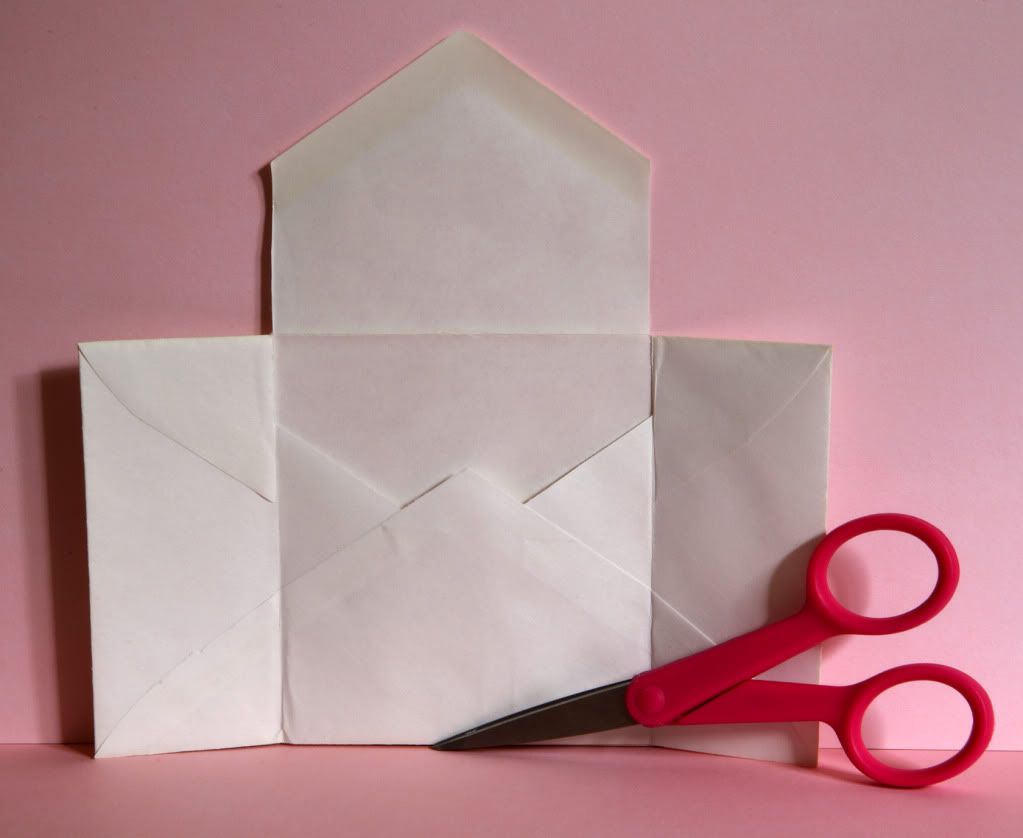
- Open envelope back up
- Cut along fold line to top of envelope
- Adhere the cut flap down to envelope back

- Finished folded envelope gift card holder
- Decorate as desire
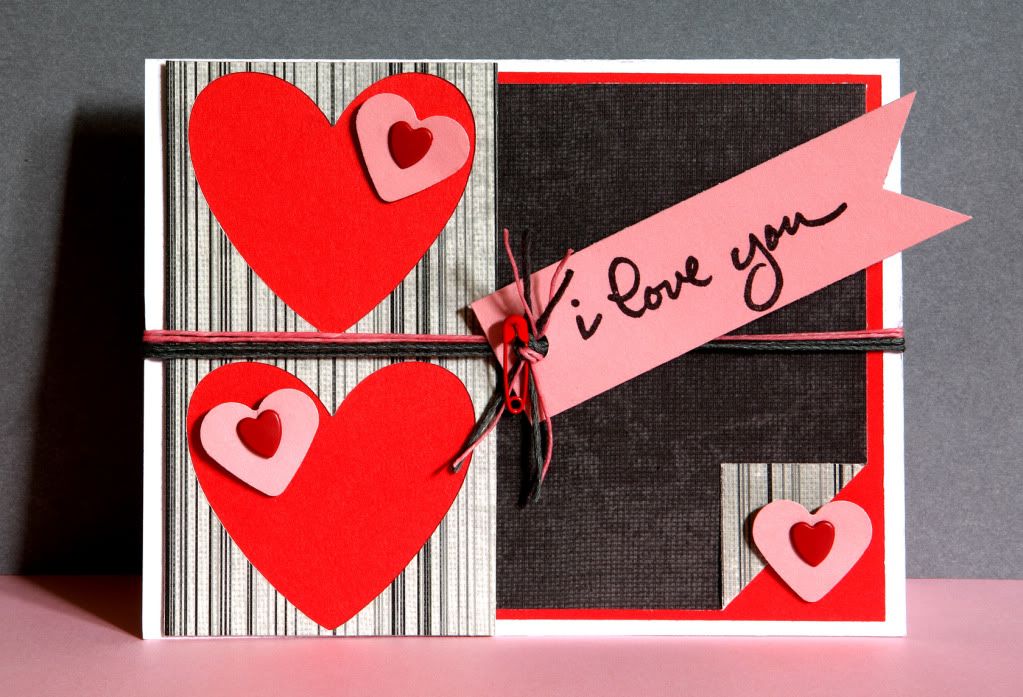
3.) I Love You
And the last of the three Valentine shares is a card using the fabulous Black, Red and Pink color combo again. This card will be entered in the Paper Playtime Challenge #67 - Cricut Creations with hearts or Love theme. Check out their blog and play along!
 |
| Sorry, red color did not show up so good |
To make this card:
A2 standard white cardstock for base. I layered red cardstock and the backside of pattern paper (Purple Pinwheel) on top, folding bottom right corner up to expose the pattern. I then cut two hearts using the Ultimate Creative Series cartridge, Bonus 1 <Img21-s> at 2". This is a heart from Wildcard cartridge. I actually used the cut as a stencil and layered over red cardstock. (All cardstock from CTMH). Layer all pieces together as shown in photo, working back to front.
To complete this card:
I stamped "I Love You" message (CTMH) on pink cardstock, clipped the end with square punch to make banner. I added pink heart punch, red heart brads, pink and grey floss and attached the banner with a red safety pin.
Catch the Frenzy!
What fabulous projects! I especially like your Love Bug card! It's so sweet!
ReplyDeleteThanks so much for playing along with us at Fantabulous Cricut!
Kate
Small Bits of Paper
Love your cards, simply adorable! Thank you for joining us at FCCB!
ReplyDeletehttp://scrapqueen141.blogspot.com/
Awesome cards!!! Thank you so much for joining us in the challenge at FCCB!
ReplyDeleteSherrie K
http://sherriescraps.blogspot.com
I was by yesterday and came back to admire your projects again and to say thanks so much for playing along with us at My Craft Spot too! Such a great job you've done with them all!
ReplyDeleteKate
Small Bits of Paper
You a so sweet! I love both My Craft Spot and FCCB blogs and check in frequently for inspiration.
Delete