Showing posts with label Elegant Edges. Show all posts

Tuesday, February 11, 2014

TSOT sketch #155 - HELLO

Today is Tuesday and that means I have a new sketch for you to try over at...
Team B has created some AWESOME cards with Sketch # 155 as their inspiration 
Our TWIST this week  - Hearts and/or Flowers

Here's my card...

 
Sketch #155
 
 
I started with a light green A2 cardstock base
Layered with Designer paper from American Crafts in a kit called Soho Garden
I used Cricut cartridge -Elegant Edges to cut my 2 -1/2" scalloped flower
And the Flower Shop cartridge to cut two, 1-1/2" leaves
I sponged ink around the edges of the scalloped flower and leaves
I also added black doodle lines along the edges
I finished the card by adding a treat cup from Stampin' Up that I had in my stash
The sentiment and beads are really old Close to My Heart that I used to complete the card
 
 
I invite you to play along with us this week
Bur first, get inspired by checking out the rest of Team B creations
I am sure you will find plenty of inspiration if you do
 
So glad you stopped by today - have a WONDERFUL Tuesday
 
Catch the Frenzy! - Karen


Tuesday, November 5, 2013

Technique Time Tuesday

Here to share with you on the first Tuesday of the month for Technique Time Tuesday

Our technique this month is... Faux Frame

 
Supplies used:
Paper from Simple Stories - 6 x 6 pad - Fabulous
Chocolate and Desert Sand ink
Copic makers:  R22, R32, BG15, BG34, E00
I used my Circuit cartridge - Elegant Edges to create my frame, as I do not have any nesting dies
Image very old Close to My Heart stamp
Sentiment from - Verve - Purely Sentimental
Finishing touches include pink cardstock banner and pink adhesive pearls
 
This is a really Quick and Fun Technique with great results
I hope you will have a chance to join us this month
Make sure to check out the tutorial Mynnette has created, as well as all the Design Team samples
Be INSPIRED, get CREATIVE and try something NEW
 
Make sure to check out my second post today for Try Stampin' on Tuesday
 
Thanks for coming by today.  I hope you enjoyed my cards.
 
Catch the Frenzy! - Karen

Friday, August 16, 2013

Sea Life Challenge with Digi Haven

Today brings a new fortnight challenge at DIGI HAVEN 
Our theme for this challenge is...
 
SEA LIFE
 
 
I chose Miss Beauty to work with for this challenge from Our Sponsor...Digi Stamps 4 Joy
 
 
My card is a 6 x 6 card

 
I colored the image using my Copic markers in the following colors: Y02, Y04, YR20, Y11
 
Designer paper from Little Yellow Bicycle - 6 x 6 pad - SPLASH
 
I used Cricut cartridge - Elegant Edges to cut my circle at 5"
(sorry not at home, posting from my dad's house, so I can't tell you which page and image)
 
Sentiment from Birdie Brown (NOTE: freebie from July, also a Dolphin - still up on the blog)
 
I was inspired by the little shell, sequin, bead mix I had in my stash
I so wanted to make a shaker card - the shells were a little to big to be a part of the shaking mix
I also had a bit of trouble with the idea in my head, translating to paper
So frustrating when that happens, but it's all GOOD now :)
I hope you like my finished card
 
I invite you to join us for this challenge
Check out the How to Play tab
Have FUN with this one - so many wonderful Sea Life digital images to use
 
And don't forget to check out the rest of the Design Team cards showcased on the blog
As well as our Guest Designer - Alex from the DS4J Design Team
 
BTW - today is my Birthday!
I will have a post sometime this weekend with a little give away
Be on the LOOK OUT for the post
 
Thanks for stopping by today - Have a great weekend
I am off to Portland to take the Copic Intermediate Class on Saturday
My birthday present to myself - Happy Birthday to me!
 
Catch the Frenzy! - Karen

I am entering this card in the following Challenges:

Crafters CafĂ© - #24 At the Beach
Fresh Brewed Designs - Ocean or Beach & Glitter
Southern Girls Challenge - Things that begin with "F"
Creative Moments - #23 - Sea/Sea Shore/Anything Goes


Tuesday, April 16, 2013

Sketch #114 for Try Stampin' on Tuesday

Good Morning and Welcome to my Blog
If you are a new, please take a look around and consider becoming a follower

Tuesday is my Design Team day for Try Stampin' on Tuesday
and we have a new sketch to share with you - Sketch #114
 
 
Here's my take on the sketch this week - using items from my stash
 
 
Cardstock and pattern paper from my stash (do not remember what company)
I found this teal colored die from Cricut cartridge Elegant Edges in my box of dies cut but not used
Stamp is a really old Close to My Heart sentiment
I finished my card with some washi tape, adhesive pearls and a bow
 
Still trying to make cards with supplies and papers I have on hand
It's a good feeling to clear it out - I have too much!
 
I hope you will have a hcance to join us this week
Make sure to visit the blog to see the rest of the Design Teams creations
Be inspired this week and create something wonderful to share with us
 
Catch the Frenzy! - Karen


Tuesday, April 2, 2013

Sketch for Try Stampin' on Tuesday

This week is sketch #112 at Try Stampin' on Tuesday
 
It's another fun sketch for you to try this week
 
 
Here's my card...
 
 
 I used a stamp set from My Favorite Things, which I believe is no longer available
However, check the store anyway, there is a lot of great stamps, papers, dies and embellishments
 
Paper is from 6 x 6 paper pad by Little Yellow Bicycle - Splash
Frame is from Cricut - Elegant Edges cartridge - page 53 <Flrsh2> cut at 3-1/2"
The images was stamp on the light blue paper for the bottom layer
Stamped again on the light blue paper, I colored the dress only using Copic markers: B05, B12
The image was also stamped on white cardstock several times for multiple layers
Colored the skin using E00, E21
Colored the sunflower using Y11, Y15, Y17, YR04, YR07, E35 and the Stem using YG23
 
Finishing touches:  sunflower brads, sunflower bakers twine and a little banner for the sentiment
 
Be inspired by the Design Team cards this week - check it out!
 
Thanks for visiting today - Catch the Frenzy! - Karen

Tuesday, March 26, 2013

Try Stampin' on Tuesday


It's Tuesday and that means my sharing day for my Design Team card over at...


We have another wonderful sketch this week - Sketch #111
 

Here's my card - BLOOM


Stamps from Close to My Heart
Papers October Afternoon 8 x 8 paper pad
Ink Tulip and Juniper
Cricut - Elegant Edges - I can't remember the description or size I cut - found it in my stash
Adhesive pearls, ribbon and gold metal bead
 
Now take a PEEK at the rest of the Design Teams wonderful cards they made to INSPIRE you
 
I really hope you will join us this week.
 
Catch the Frenzy! - Karen

Monday, March 25, 2013

Anything but a Card challenge at...

Tammy's Scrapin' Corner with Challenge #55 - Anything but a Card
 
I decided to make a little note pad cover, using the Pen Pal Mouse from Meljen's
I have a lot of these little golf pencils left over from a previous project from many years ago
They are perfect for this type of project.
 
 
My note pad measures 3-1/2" x 5"
I covered the front on the pad with Aqua cardstock, cut at 3-1/2" x 6, adhere the extra 1" at the back
I used the Cricut - Elegant Edges pg. 37 to cut the <Stamp-s> at 3-1/2" on red cardstock.
Printed and cut my Pen Pal Mouse image into a 3" x 3" square
Colored the image using the following Copic markers:
BG10, C-1, C-5, E02, E31, E33, R00, R20, R22, R27, Y02, Y08, Y17
I created a yellow 1-1/2" square banner and used old letter stickers to spell out NOTES
I also cut a strip of yellow cardstock to hold my pencil
Adhere this strip to the back of the pad and then to the front prior to attaching the image over the top
Finishing touch - added a gingham ribbon and bow
 
We have 3 wonderful sponsors this week


Now make sure to check out the blog for all the creative ideas the Design Team has come up with.
They are very INSPIRATIONAL
Now use your imagination to create Anything but a Card and share it with us this week
I look forward to seeing what you come up with.
 
Catch the Frenzy! - Karen
 

Friday, February 15, 2013

Warmest Wishes...

A new fortnight challenge at Digi Haven starts today - Friday, 02.15.2013

For this challenge...
Create a card or project using a digital image or digital sentiment following our theme:

SNOW / SNOWFLAKES

Our Sponsor is our very own Design Team member, Mynnette Kitchen from On a Stampage


Mynnette has created three Digital Sentiments for us to give to the winner of this challenge.


Thank you Mynnette!

Remember to use a digi image on your project and check out the How to Play tab.


The front of my circle card...

 
And the inside of the card...


Supplies used to make my card:
 
Cricut cartridge - Elegant Edges - page 65 <Flower3> and <Flwer3-s> both cut at 5"
Cricut cartridge - Joys of the Seasons - page 61 <Flake4> cut at 2-1/2", 2" 1-1/2"
4" Circle cut from Designer Paper, trimmed to 2-1/4", use smaller section of circle for inside card
4" White cardstock circle - run through Cuttlebug using snowflake folder
Sentiment from Mynnette Kitchen
 
Finishing touches:
Crystal Blue ribbon bow, white snowflake element and blue adhesive rhinestone

So glad you stopped by today and remember to check out the Design Team inspiration.
Be inspired and create a Snow / Snowflake project and play along with us!

I hope to find a few challenges to enter as well - I'll be back if I do!
Found some :)

Christmas at Sweet Stampin' - Challenge #3 - Snowflakes
Delightful Challenges - Frilly (Scallops & Lace)
The Play Date Cafe - PDCC169-Warm and Inviting


Have a most Fabulous Friday - Catch the Frenzy! - Karen


Tuesday, January 29, 2013

You are the...

Only One for Me!
 
This week at Try Stampin' on Tuesday we have sketch #103 for you to try.
 
 Sketch #103
 
And here is my card using Sketch #103 as my inspiration
 
Supplies I used to make my card:
I decided to make a long card for my creation - my card base measures 3.5" x 8"
All cardstock from my old stash of Close to My Heart papers
Designer Paper - Echo Park 6" x 6" paper pad - "For the Record 2" by Lori Whitlock
I used my Cricut cartridge Elegant Edges, page 39 <swirl2-s> frame feature cut at 3"
The sentiment is from My Favorite Things
It's called Lovey Dovey and you can find it HERE
Stamp the sentiment using Memento - Tuxedo Black on the inside frame piece
 
Finishing touches:
Green adhesive pearls
Black bakers twine and bow
 
Each week there is a great sketch to get that creative MOJO flowing,
as well as some great inspiration from the Design Team.
This was a quick sketch to use, with awesome results.
I hope you will be able to join us this week at Try Stampin' on Tuesday!
I can't wait to see what you come up with.
 
Thanks for stopping by today - Catch the Frenzy! - Karen

Saturday, January 5, 2013

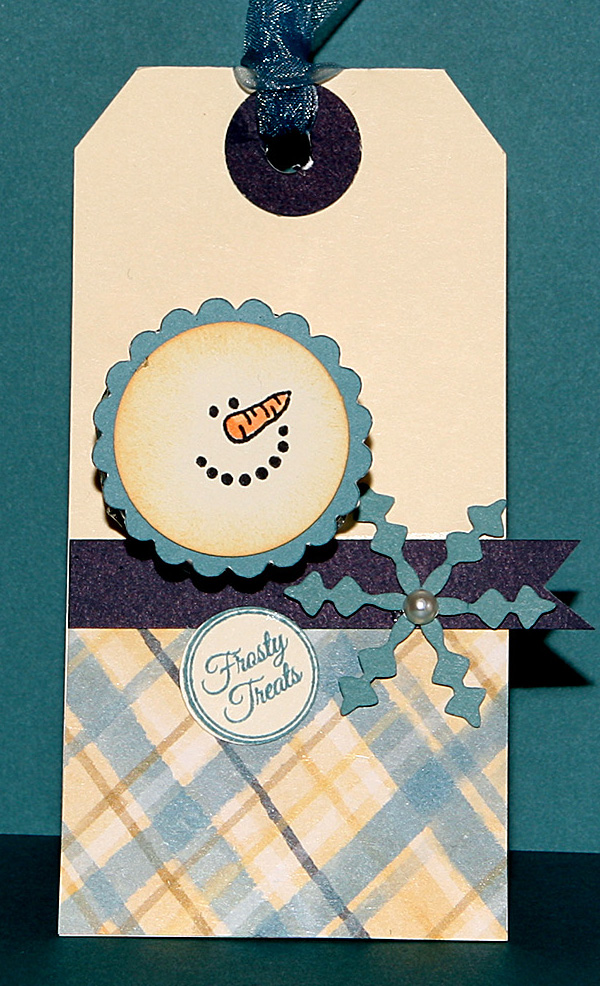
Some Frosty Treats...

It's been really frosty in my part of the Pacific NW the last few days.
I am drinking my coffee and cuddled up in a blanket to take the chill off.
No plans today, which is great because I feel like being lazy!
 
But, I did want to share a cute little tag with a treat I made for all 60 co-workers at school.
 
 
Supplies used:
Tags were a find at a yard sale - approximately 2-1/2" x 3-1/2"
All paper from my Close to My Heart stash
Navy cardstock cut 1/2" x 3" for banner, clip the ends with a square punch, also a 3/4" circle punch
Designer Paper cut 2" x 2-1/2"
Cream cardstock - after stamping/coloring image punched out with a 1" circle punch
Snowman face is an old CTMH set - black ink and colored with Copic markers, YR02, YR04
Twilight cardstock I used the following Cricut Cartridges:
Elegant Edges - page 23 <Sclopl-s> cut at 1-1/2"
Joys of the Season - page 61 <Flake-4> cut at 1-1/2"
Frosty Treat sentiment from Jaded Blossom - Winter Candies - Twilight ink on cream cardstock
Finishing Touches:
Sponged Creme Brulee ink around the snowman face
Adhesive pearl to snowflake center
Twilight ribbon to my tag
Adhered the Snowman face to a Pearsons mint pattie
 
 
I thought the tags were so cute laying all over my work table, so many cute snowmen smiles!
 

Here's a close up of the finished tag.
Mint pattie under the snowman face and I added a label to the back side that read:

Happy New Year
Thank you for your Commit "MINT" to our students.

I really hope you have enjoyed my little share today.  Thanks for stopping by!
Have a great weekend and and don't forget to Catch the Frenzy! - Karen
 

Friday, September 14, 2012

Fall Ball Blog Hop

Welcome to the Fall Ball Blog Hop,
brought to you by the design teams of...
Made Especially For You and I Heart {ippity}!

Today we're happy to share with you all sorts of fall-themed projects to get you in the mood for a season full of crisp leaves, bountiful pumpkin patches, warm apple cider,
and all those other things we love that make fall such a wonderful time of year.

If you've come from Eileen's blog, you're in the right place.
If you just came across the hop and would like to start at the beginning,
please visit Made Especially For You.

For my project, I created this "Count your Blessings" card using this digital image HERE.


My card recipe:
Image colored in with my Copic markers, then cut out using a oval cutter.
Using the Cricut, "Elegant Edges" I cut a scalloped oval at 4-1/2" using the <Flower3> oval feature.
I mounted my image over the top of the Cricut scalloped oval.
Layer all pieces together, working back to front as shown in the photo.
Finishing touches:
Adhesive pearls around the scalloped oval and bottom right edge.
As well as a rich cranberry ribbon/bow


We also have some wonderful sponsors giving away prizes!
To be eligible you must comment on every stop along the hop!
$15 Gift Certificate


$20 Gift Certificate

The winners of the blog candy will be announced on
Made Especially For You  on Tuesday September 18th.
Please make sure to leave your contact information when commenting to be eligible to win!

Your next stop is Jeannie's blog
Here's the complete lineup in case you get lost along the way:


Happy Hopping and Catch the Frenzy!
Thanks for stopping by today - Karen

Monday, August 20, 2012

National Tooth Fairy Day


My share this week for , Challenge #125 "National Tooth Fairy Day"
Make a card using a Tooth Fairy, Tooth or Smile.
How fun is that? And I was also given a little stamp set to work with.


Using Tooth Fairy from our fabulous sponsor this week...


Jaded Blossom Blog
Jaded Blossom Store

To make my card I started with an A2 card, red cardstock

Cricut cartridges used:
Simply Charmed, pg. 53 <paper> cut at 4" on white, also shadow feature using aqua
"Just Because" Cards, pg. 42 <Truck-s) cut at 4-1/2" for the striped scalloped edge
Elegant Edges, pg. 59 <Flower2> cut at 2-1/2" using the frame feature, red flower

Next steps:
I rounded all corners of my papers, which were scraps from my stash
Using Sunny Yellow ink, sponged around the note paper
Tooth image sentiment stamped with Momento Tuxedo Black ink
Colored image using Copic markers:  BG10, RV10, RV29, Y02, Y08, Y17 and Colorless Blender
Cut image out and layer all paper as shown in photo, working back to front.

My finishing touches included:
Black and white doodle lines
Glitter and rhinestones on the crown and wand
aqua bakers twine and red/white jumbo paperclip
And the last thing I added was a little treat container from Stampin' Up
I tucked two quarters inside and attached with mounting tape

This was a really fun project,
 again I had to be really creative, as I do not own any of the Boxes, Bags and Tags cartridges.

I can't wait to see what you come up for this challenge.

Have a great week - Catch the Frenzy! - Karen


Saturday, July 28, 2012

A Designed 2 Delight share...

Today, I am sharing another Designed 2 Delight card using one of the July new release images.  


I used the Sick Chick image with the Sick sentiment. 

You can view the entire Bird Brain collection HERE 

There is still time to play in our Color Combo Challenge.

Enjoy your Saturday and go out and play!

Thanks for stopping by today - Catch the Frenzy! - Karen

Saturday, May 19, 2012

New Baby

A little late with my sharing for the Fussy and Fancy Challenge, Challenge #63, New Baby.  But here it is.  "Oh Happy Day".  My very first card as a DT member at Fussy and Fancy.  Still learning to color with my Copics, but enjoying using them.  I find coloring to be very calming.

To make this card I used pattern paper from a Miss Caroline - Dilly Dally 6 x 6 pad.  All solid card stock is from Close to My Heart.  My sentiment is from Impress and the cute little elephant is Bubba the Elephant from Memory Box.

I used the following Cricut cartridges:  George & Basic Shapes, page 108, <circle>, cutting two 2-1/2" on white.  Cut one in half.  Elegant Edges, page 65 <Flwers-s> cut at 3" on yellow.  Just Because, page 46 <Apple-s> cut two at 5-1/2" in yellow for the scallop edge.  I also cut banners and trimmed the ends with a square punch.

Finishing touches include doodles along edges, hanging the banner on a piece of red/white bakers twine and brads.  Thank you for stopping by today.

So head on over to Fussy and Fancy Challenge and check out all the inspiration from our Design Team.  I hope you will have a chance to play along with us as well.

Thanks for stopping by today.

Catch the Frenzy!

Monday, April 30, 2012

"Save the Earth" FCCB Cricut Crawl


Welcome to Simply Frenzied and the SEVENTH Fantabulous Cricut Crawl...Fantabulous Cricut's version of a Blog Hop!

In honor of our Home Planet, Mother Earth, we're having a "Save the Earth" Crawl...each Design Team member will be featuring an original Upcycled-Themed Project that includes at least one Reuseable/Recycled Item along with at least ONE Cricut Cut.

If you've come from visiting Judy at http://craftyjar.blogspot.com/ you're in the right place! If you've just happened across my blog and would like to play along with our Fantabulous Cricut Crawl, start HERE http://fantabulouscricut.blogspot.com/

Make sure to check out each DT member's blog for some awesome inspiration! There will be PRIZES along the way at our DT members' blogs, AND there will be a Grand Prize up for grabs at FCCB for one participant that submits a "Save the Earth" project at FCCB!


How fun is that?

For my project... I made two 3-1/2" x 6-1/2" tags. 
I used 3 Up-cycled items:

1.) cardboard, trimmed to size.

2.) covered with pattern paper bag that I received from a purchase at a scrapbook, trimmed to size.

3.) soup can pull top tab attached with a brad.


My Cricut cut is from the Elegant Edges, pg. 65, <Flower3> and <Flwer3-s> using the oblong feature cut at 4".  All embellishments, stamp and ink were used from my stash.

I have blog candy to giveaway (I'll post a picture Monday night). 

However, in order to be eligible to win my blog candy, you must complete the following:

  • Become a follower
  • Leave a comment on my blog
  • Link your project to FCCB during the week of the Cricut Crawl

Now it's your turn! Let's see your Up-cycled-Themed projects! Make sure to include a Cricut Cut somewhere on your project!

Next stop... Kate's blog, http://smallbitsofpaper.blogspot.com/ to see what she has in store for you today... And when you're done, make sure to link up your project to FCCB's Fantabulous Cricut Crawl post to be entered into the contest!

Happy Crawling! and remember to Catch the Frenzy!

Thursday, April 26, 2012

Get Your Girly On

Today's share is two firsts for me this week. First time I created a card for a challenge using my new Copic markers, so excited to final own a set.  My second first this week, is my first card creation as a Design Team member over at Southern Girls Challenge, challenge #43 "Get Your Girly On".  Please head on over to the blog and check out all the DT inspiration, play along with us and don't forget to link up your creation.  make sure to use all your fun girly papers, bling, and ribbon.

We have several sponsors this week, so I choose a digi image from Dts Arts, Puppy Love - Lara & Pup.


She is so adorable, and so is the little pup peeking out of her backpack.  I had a lot of fun coloring this image to coordinate with my papers.


I used the following markers: 

Face, Arms - E00, E02
Hair - E21, E33, E35
Dress, Backpack, stockings, shoes -
BV00, BV02, BV04, G00, G02, C-1, C-3


For the base of the card I used 6" x 6" light teal cardstock, layered two pieces of coordinating pattern paper, cut at 5-1/2" sq. and 5-1/4" sq.  A third piece of coordinating pattern paper for the bottom edge was cut at 2" x 6", with white lace trim at the bottom and lilac ribbon tied around the card at the top of this piece. 


I stamped the sentiment, from Studio G in black ink on to a 1-1/2" circle and layered it on top of a 2" lilac circle. I used my Cricut Elegant Edges cartridge, pg. 65 <Flower3> white, <Flwer3-s>  lilac using the oblong feature cut at 5".


To finish:  Cut out the digi image, layer all remaining pieces to the card.  I then added teal adhesive rhinestones around the oval cut out and at the bottom of the sentiment circle.


Thanks for stopping by today.


Catch the Frenzy!

Monday, April 23, 2012

FCCB Challenge me Monday...

Monday brings another Challenge Me Monday over at Fantabulous Cricut.  For this weeks challenge #108 On the Go, we are to use either Car, Plane, Train, etc... something that has wheels and moves.

I choose to use an image from my Ultimate Creative Series Sampler cartridge, Bicycle <image23> on the Bonus 2 overlay (note:  this image is also found in the Heritage cartridge), cut at 3".  Making this card took some time, as I decided to do a little paper piecing.  I actually cut the image out 4 times to get the varies pieces in the four colors I wanted to use.  Light Grey, Grey, Red and Yellow.  After cutting out my pieces, I added sponging and line work around the edges.  I then layered my pieces together, working back to front.

I found a great piece of background paper from a 6" x 6" pad by Miss Caroline called Dilly Dally.  It made it look like the bicycle was leaning against a wall.  I then used the Elegant Edges cartridge to cut a 4" <Flwer3-s>, pg. 65 using the oblong feature.  I stamped my sentiment in the center.

My finishing touches as the yellow flowers with buttons and brads added to the center.  I added brads under the sentiment and tied red bakers twine around the top of my card.  To create the flowers in the basket, I first added a small piece of paper doily draped over the top.  I then punched 9 circles using a paper punch, doodled lines around them and added them to the basket.  I filled in some gaps with 3 more brads and finished with glossy accents.

Thank you for staopping by today and please take a minute to check out the challenge at Fantabulous Cricut and consider playing along this week.  We would love to see what you have created.

Catch the Frenzy!

Tuesday, April 17, 2012

The Craft's Meow April Sketch Challenge

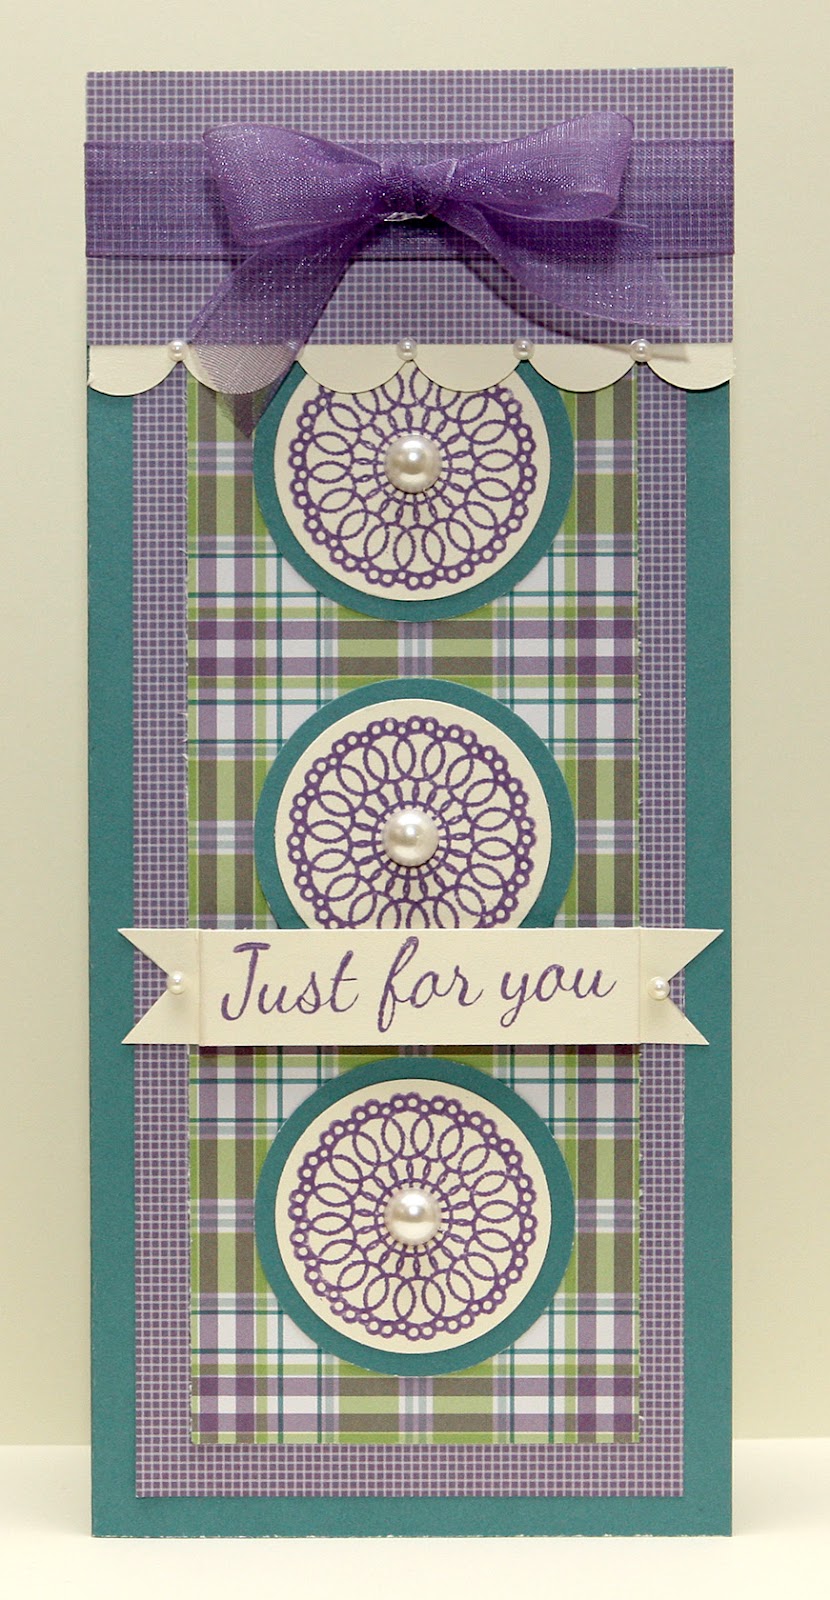
My share today is a card I made for The Crafts Meow April Sketch challenge posted below.  I just recently purchased some stamps from them, but haven't had a chance to use them yet.  I choose their "Just for You" set to work with for this challenge.

The base is a 3-1/2" x 8" teal colored card from my stash of Close to My Heart papers.  I layered two coordinating pattern paper from my stack Recollections - Bold Basic, cut at 3" x 7-1/2" for the bottom layer and 2-1/2" x 7" for the top layer.  I stamped my image 3 times and sentiment with Close to My Heart, Gypsy ink on to cream cardstock.  Punch the images out with a 1-1/2" circle punch and punch 3 teal circles with a 1-3/4" circle punch.


I also cut a 1-1/2" x 3-1/2" pattern paper and a 4" scallop border in cream cardstock cut from the Elegant Edges cartridge, page 48, <sclops-s> using the oblong feature, trimmed to 3-1/2".  Cut a 1/2" x  3-1/2" cream cardstock for the sentiment banner, punch the ends with a square punch to create the banner.  Layer all paper pieces as shown in the photo.  My finishing touches are tiny adhesive pearls to the scallop border, the banner and medium size to the centers of the images.  And last of all, a organza lavender ribbon bow at the top.

Thank you for stopping by today, enjoy my card, stop by The Crafts Meow to check out the sketch and play along.  Hope your day is filled with joy.

Catch the Frenzy!

Monday, April 9, 2012

Buttons and Bows

I can't tell you how much fun it is to design for Fantabulous Cricut  and this weeks Challenge Me Monday #106 - Buttons and Bows was no exception. 

The challenge is to add at least one Button and one Bow to your project, but make sure you have at least one Cricut cut on the project as well.  Please stop by and play along with us this week.

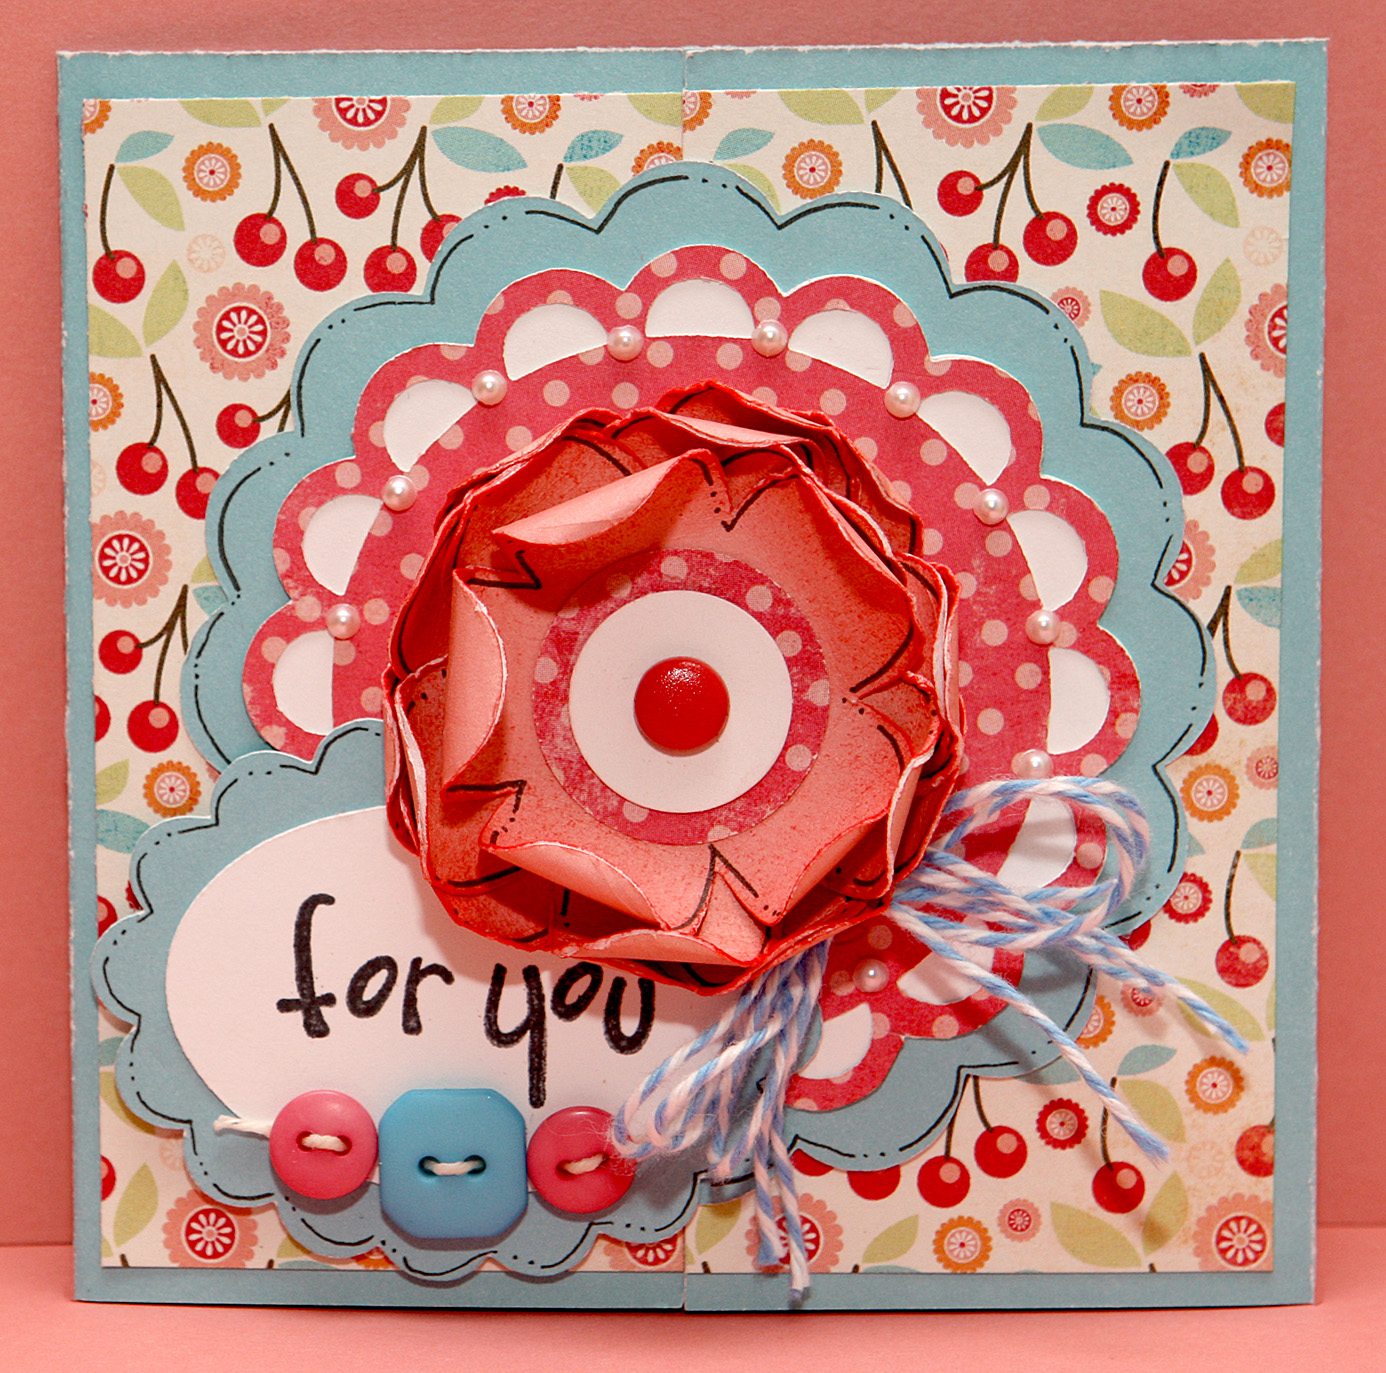
My card starts with a 4-1/4" x 8-1/2" piece of bright blue cardstock paper.  I scored this piece at 2-1/8" and at 6-3/8" so when folded it creates a 4-1/4" x 4-1/4" square card.  I then cut 4 pieces of coordinating paper at 1-7/8" x 4" and one piece at 4" x 4".  Bright blue and white cardstock from Close to My Heart, pattern paper from My Minds Eye 6 x 6 pad Fine and Dandy.

I used the following Cricut cartridges:

Elegant Edges, page 65 <Flwer3-s> bright blue cut at 3-1/2" and 1-1/4" (for the inside of card), white cut at 3" and 1" (for the inside of card).  Also cut <Flower3> at 3" from a pattern paper and a 1" piece from the same pattern paper (for the inside of card).  The last cut from this cartridge is  <Flwer3-s> bright blue cut at 2-1/2" using the oblong feature. 

I also used the George & Basic Shapes cartridge, page 114 <oval1> cut on white cardstock at 2".  I stamped the "for you" message onto this piece.  The flowers on the front are from this cartridge as well.  You will find them on page 120, <flower2>, cut five flowers (I used blush cardstock from Close to My Heat) at 2" using the shadow blackout feature.

Because I made an Oops!, I also cut a 1" x 4" white cardstock for the inside "happy birthday" message, which covers my Oops!.

Adhere all layers of this card, working back to front as shown in the photo.  Please note that the scalloped circle is only attached to the left card flap only.

For my finishing touches, I sponged blush ink around the edges of the flowers, distressed and curled the edges,  I then doodled black lines around the flowers and the bright blue scalloped circle and oval.  I added two circle punches and brad to the center of flower, floss through the three buttons, tiny adhesive pearls around the pink scalloped circle and a twine bow, which is swimming pool color from Doodlebug.

Have a Fantabulous week and remember to Catch the Frenzy!

Monday, March 26, 2012

It's Springtime

It was an absolutely gorgeous spring day today in Washington, with sunshine and purple crocus popping up in my yard.  Lovin' it. 


So my card today is one I made for iSpy Sketches  based on the sketch below.  If you have not had a change to check out their blog, please do so.  They have fun sketches to work with and the Design Team creations are very inspirational.

To make my card I used ink, paper and stamps from Close to My Heart that I had in my stash.  I began with an Orchid Bouquet A2 card.  Layered the Indian Corn Blue gingham paper on top.  For the center piece I used Elegant Edges Cricut cartridge, page 65 <Flower3> with the Oblong feature cut at 4", added the shadow in white cardstock.  I also cut a 3" <oval1> found of page 114 of George & Basic Shapes Cartridge.  The bird and birdhouse images were stamped in the same ink colors as the paper.  I also used Clover Meadow for the leaves. 

Finishing touches were adding the green grosgrain ribbon to the right side and a bow at the top.  The "thinking of you" message were stamp with black ink on a white strip of cardstock paper.  I clipped one end with a square punch to create a banner effect.  Small adhesive pearls around the oval really finish this card off.


Thank you for stopping by today. Enjoy your week and check back for more sharing.

Catch the Frenzy!


Related Posts Plugin for WordPress, Blogger...