Sunday, January 29, 2012

A good day to blog

Today is a rather deary, rainy Sunday, which makes it nice to be able to sit in the recliner and write my blog without feeling too guilty for doing so.  I have enjoyed sharing my creations with you and hope you will continue to follow me, as well as be inspired. Last week two of my cards were selected for Top 3 at My Craft Spot and Top 5 at Fantabulous Cricut Challenge Blog.  Today I have three cards to share, so please scroll day to see all three.

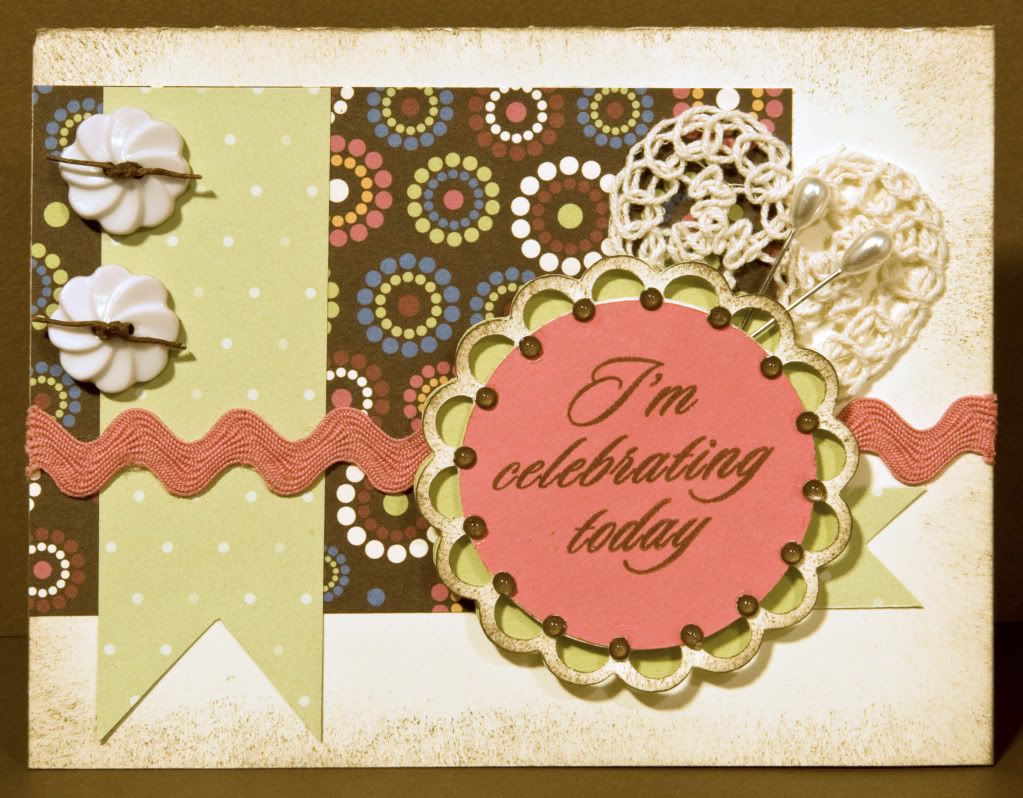
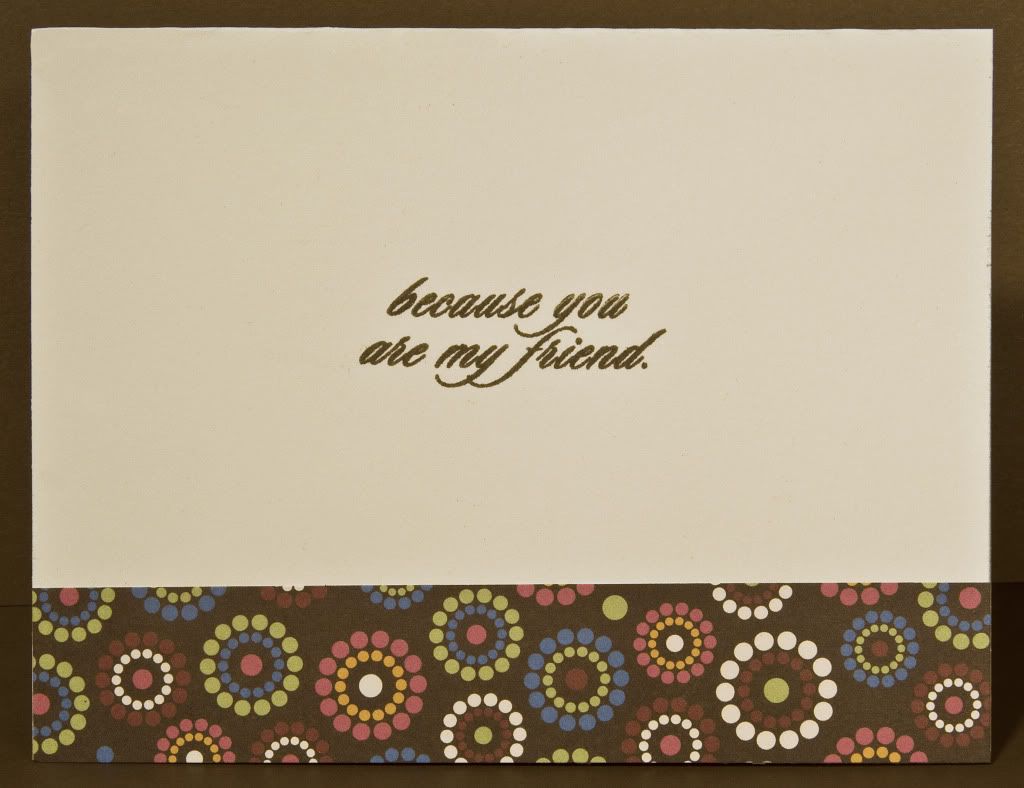
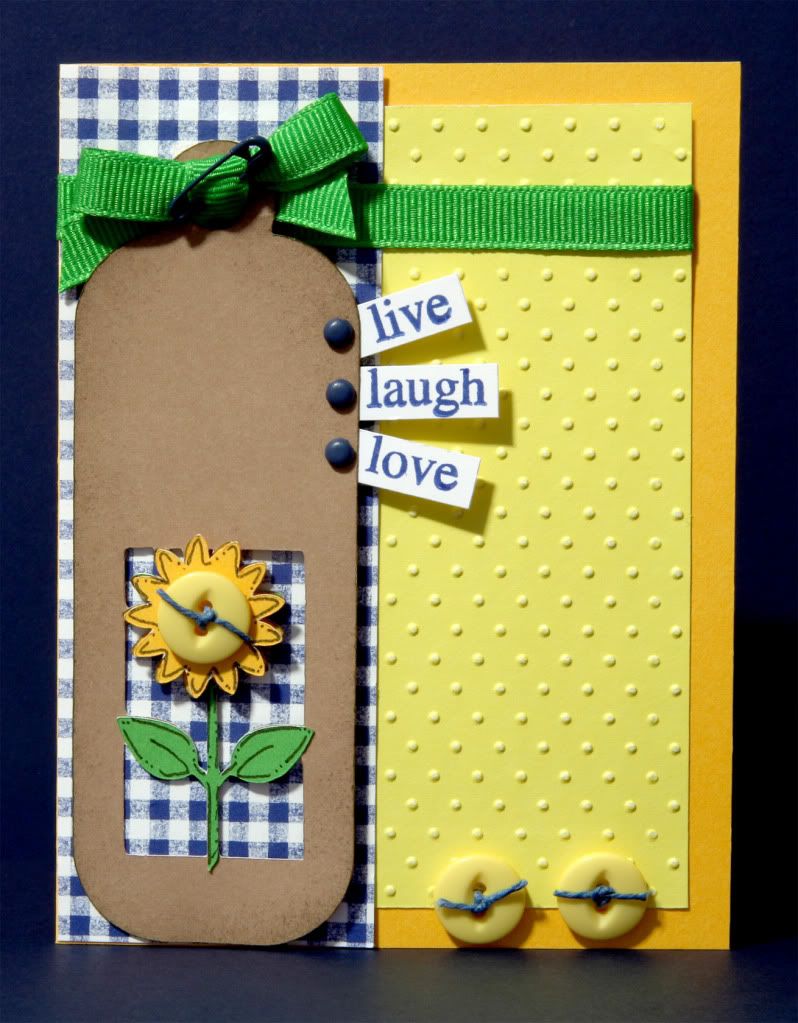
My first card to share...Live Laugh Love
This card was created for this weeks Fantabulous Cricut Challenge Blog - Challenge Me Monday #95 - Label it!  I choose to use a sunflower, as it is so cheery and reminds me if sunshine, which we have not seen in a few weeks here in the Pacific NW.


To make this card...


Cut as follows:
Standard A2 card - Sunflower cardstock
5" x 3-3/4" - Sunny Yellow cardstock
5-1/2" x  2" gingham pattern paper - Navy
All paper from Close to My Heart


Cartridges:
Walk in My Garden - pg. 100 <snflwr> using the tag feature cut at 5" on Chocolate Brown cardstock.  I also cut layers as well.

To complete this card:  I ran the Sunny Yellow cardstock through my Cuttlebug machine using the Swiss dot A2 folder.  Sponged chocolate ink around the edges of the tag.  I also used a 05 Black Micron pen for the details around the sunflower, stem and leaves.  In my stash of goodies I found navy floss, safety pin, brads, a bright green ribbon and some sunny yellow buttons.  The words from Close to My Heart were stamped in navy.  Layer as shown in the picture, working from back to front.  I hope you enjoy this little bit of sunshine! 

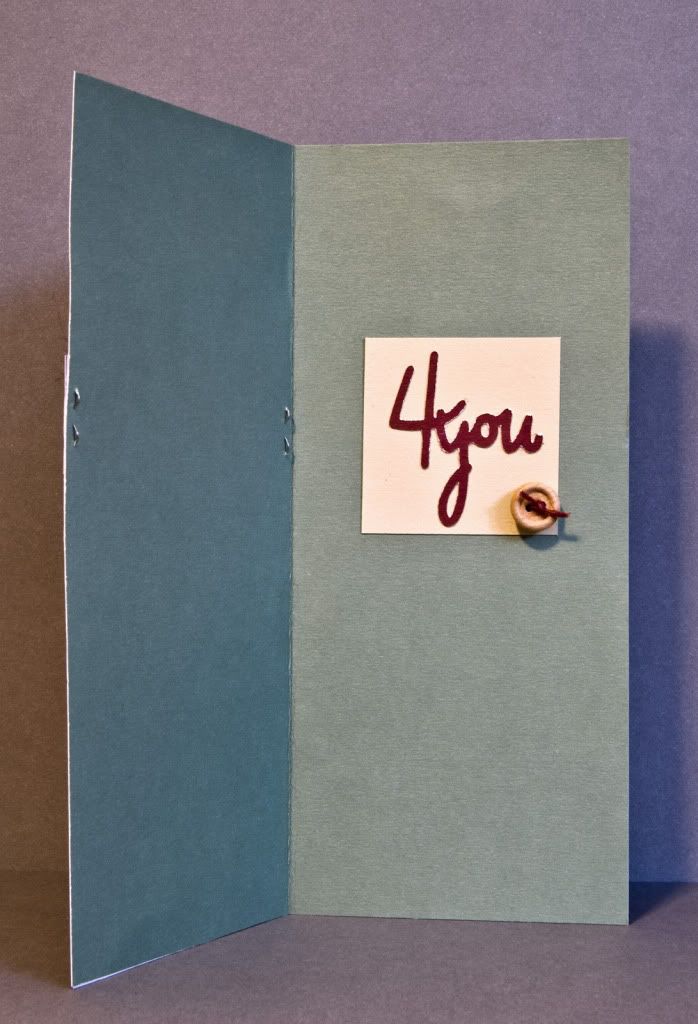
Next up...Congratulations, You passed your Road Test
This card was created for My Craft Spot - Monday Challenge #42 - Let's hear it for the boys!  Creating boys/masculine cards can be a challenge, however I have raised two sons to adulthood, so I have made my share of boys/masculine cards over the years.  My challenge is, I do not have that many Cricut cartridges with boys/masculine theme.  I was able to find a car in "Just Because" Cards cartridge to use.  Although both my sons are well beyond the age of getting their license (10 and 7 years passed!)  I thought this idea would be fun to use for my card. 

To make this card...

Cut as follows:
6" x 6" card - Blue cardstock
5-1/2" x 5-1/2" White cardstock
1-1/2" x 5-1/2" striped pattern paper
3-3/4" x 1" Garden Green cardstock
All paper from Close to My Heart


Cartridges:
"Just Because" Cards - pg. 24 <Car> using sticker feature cut at 4" on Red cardstock
Cricut Sampler - pg. 35 <HwySign> using bonus feature cut at 2-1/2" on Buttercup cardstock

To complete this card:  I created the messages on my computer and adhered them to the cardstock.  I found some blue ribbon and large silver brads to finish off my card.  I think adding a pocket to the inside of the card with a car key tucked inside would be a great idea.

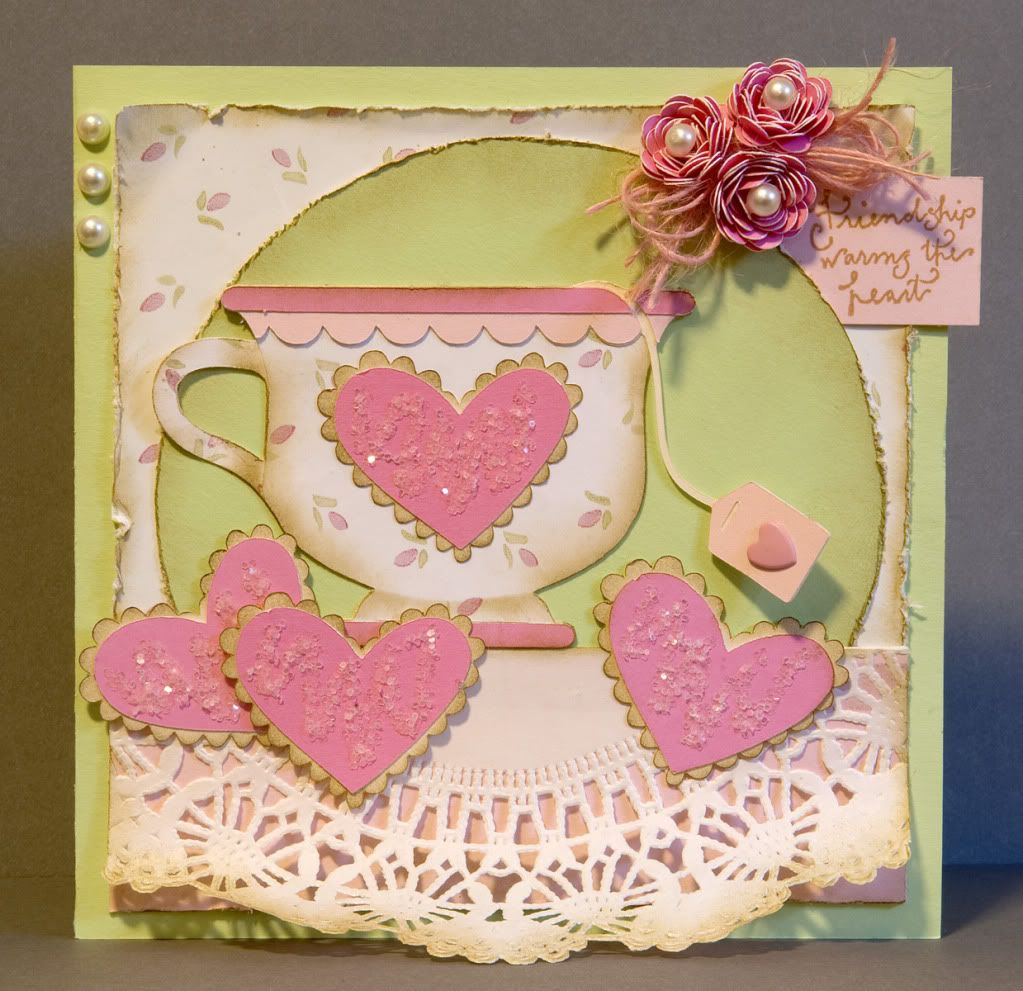
And the last card...Love is a gift from the heart 


This card is my take on the Mojo Monday - challenge #225


To make this card...

Cut as follows:
A2 card in Black cardstock
5-1/4" x 3-3/4" Pink cardstock
4 pieces of pattern paper 1-3/4" x 1-3/4"
Black cardstock from Close to My Heart
other paper from Diecuts with a View

Cartridges:
Cricut Sampler - pg. 39 <Bookplt2> 2-1/2"


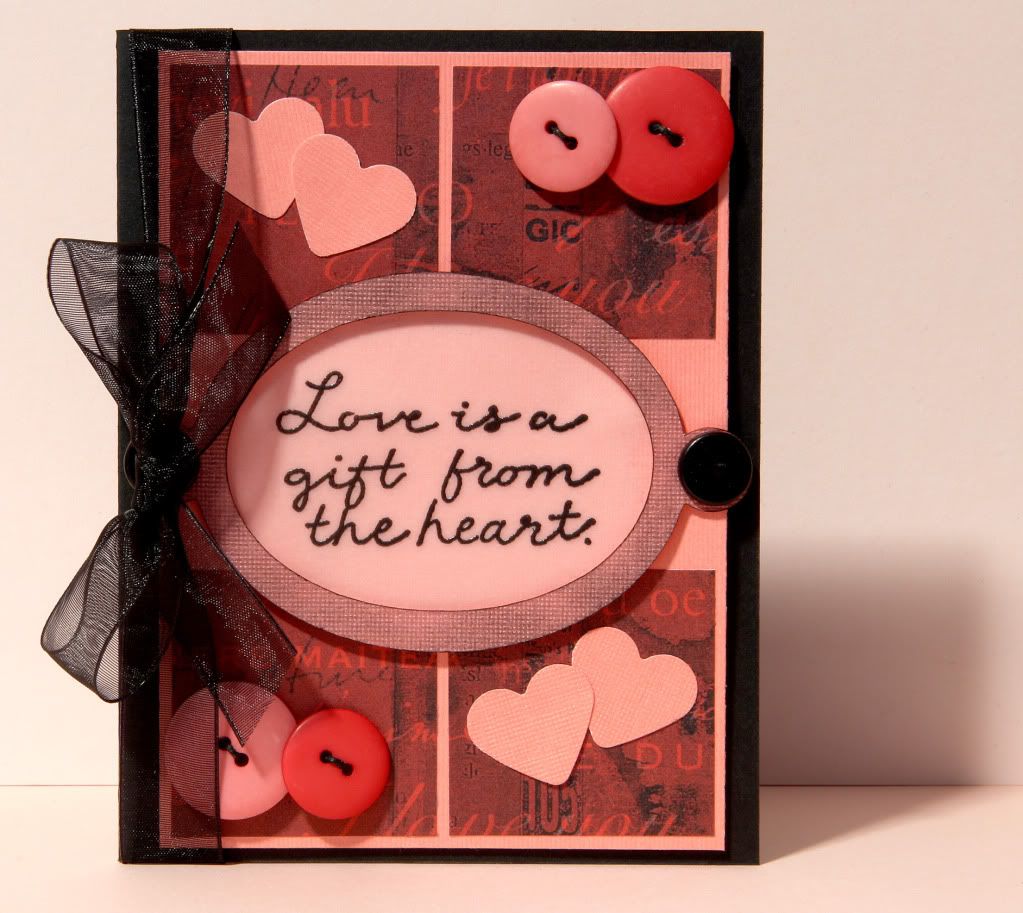
To complete this card:  I used a message from Close to My Heart, embossed in black powder on vellum paper.  Adhered the message to the back of the bookplate.  Layer all paper as shown on the picture, working from back to front.  I added large black brads to attach the bookplate to the card, black ribbon and coordinating buttons with black floss, which I found in my stash for my finishing touches.  I also added to heart punches at well.

I hope you enjoyed my sharing today and thank you for stopping by my blog.

Catch the Frenzy!

Sunday, January 22, 2012

I'm Celebrating Today

Another Challenge, another post.  This card I made is being entered into MOJO Monday - Monday Challenge #224 based on the sketch below.

Again after searching through my stash of papers, I found some wonderful coordinating pattern paper from Close to My Heart.  I believe they are Chocolate, Tulip and Kiwi??  Anyway, be inspired, to choose your own color combo.  I also came across some great elements to add to my card.  White antique buttons, a small crocheted heart, ric-rac and in my sewing basket, pearl stick pins.  I hope you will enjoy my finished card.


Inside of card
For this card cut as follows:
Base CS - A2 Cream
Pattern paper 4-1/2" x 3"
Pattern paper banner 3-3/4" x 1-1/4"
and 1-1/2" x 3/4"

Cartridges used:

Elegant Edges - <Flower3> Cream and <Flower3-s> Kiwi at 2-1/2"

I also cut a 2" circle in Tulip and small hole punches in Chocolate to add around the circle.

To complete this card:  I sponged the Cream edges in Chocolate, and added Chocolate small circle punches around the circle.  Layer all pieces as shown in the photo, working back to front.  I also added Chocolate floss to the buttons and Glossy Accents to the Chocolate small circle punches. Message stamp is from Close to My Heart.


Catch the Frenzy!


Snow Fun and Snow much Fun!

After being snowed in since last Tuesday ( I am an Office Manager at an Elementary school, Wednesday-Friday were Snow Days.  I do not report to work if Admin. building is closed). So, I am like Yippy Skippy, I can play in my craft space, designing and creating cards for my blog and some of the challenges.  But, being the responsible person I am...work before play, I spent Wednesday doing bills, filing and prepping for taxes. Well our home ended up without power for over 40 hours Thursday and Friday. Tried to work by candlelight, but I was so cold.  I spent two days huddled in front of our fireplace with a warm blanket, reading and finishing two books instead. So, I am thankful that I was actually able to complete this card in time to enter it into the Fantabulous Cricut, Challenge Me Monday #94 - Snow Fun.  Crystal blue, dark blue and lavender is one of my favorite winter color combinations.  I hope you enjoy my Snow Fun card.

For this card cut as follows:
Base of card A2 Crystal Blue
Swirl paper 3-3/4" x 4-1/4" Dk B
1 x 1-1/2" message tag Lavender

Cartridges used:
Doodlecharms - cut <snowmn> using the border feature on White CS at 2-1/2".  Note:  I also cut a second border, cutting the two end snowman out.  Using mounting tape, mount them on top of the border piece for added depth.

Winter Woodland - cut <snowflk-4> Lavender CS - three at 1-1/2" and two at 2"

To complete this card:  I used three additional pieces of White CS, varies heights and  tearing the paper at varies angles. Using Crystal Blue ink, I sponged around the edges of the snowmen and the torn White CS.  I tied Dark Blue and Lavender fibers around the necks of the snowmen, added brads for buttons and to the tag.  The snowflakes have hand sewn sequins and beads.  Layer all pieces together as shown in the photo, working back to front.  The stamp and all ink and papers from my stash of Close to My Heart products.

Wait, there's more...
My second card is one I created to enter into the My Craft Spot, Monday Challenge #41 - Snow much Fun!  I love digging through my stash of papers, elements, stamps, etc...being inspired with old items that have been long forgotten.  What's old is transformed into a new creation.  The color combination is so beautiful, I wanted to create something with a little more elegance.  I give you "Winter Greetings".

For this card cut as follows:
Base of card - A2 Brown
Cut the other three layers 1/4" smaller than the underneath layer  (Twilight, Creme Brule and a snowflake pattern paper - all from Close to My Heart)
Stripe pattern paper 1-1/2" x 5-1/2", also from Close to My Heart.
1" circle Creme Brule for Winter message

Cartridges used:

Winter Woodland - cut <Branch1>, <Branch1-s> and layers at 1-1/2".  Also, cut <Gloves>, <Gloves-s> and layers at 2-1/2"

To complete this card:  I sponged the snow and gloves with Twilight ink and stamped the greetings over both pattern paper and the circle tab.  Layer all pieces together as shown in the photo, working back to front.  Finishing touches include Glossy Accents to the berries on the branch and the snowflakes on the gloves.  I also found some itty bitty buttons in my stash, which I added white floss to. White floss also to hang the gloves loosely over the branch.

Catch the Frenzy!

Saturday, January 21, 2012

Friendship Warms the Heart

I am so excited, as I was able to get a few cards completed today and enter two of them into weekly challenges. My first two challenge entries as a new blogger!  I was inspired by the Monday Challenge #40 "It's Delicious" at The Craft Spot and this card is my finished piece of work.  I so wanted to use my Love You a Latte cartridge.  I choose to use the Teacup to create my card, which has a Victorian tea party theme, complete with dollies, roses, pearls and pretty pink sugar cookies.  I hope you enjoy it as much as I enjoyed creating it.

This is a 6 x 6 card

I used the following cartridges to create this card:
  • Love you a Latte <Teacup> and all layers 2-1/2"
  • Flower shoppe <Scallop1> 2"
  • Doodlecharms <Heart> 1-1/2" and shadow 1"
  • George and Basic Shapes <Circle> 5"
Other products used from my stash: fibers, adhesive pearls, heart brad, glitter, dollies

Note:  used desert sand ink from Close to my Heart to sponge around the edges after distressing the paper.  Also for the cookie edges to give it that baked look.

Shout Out to my husband, Kurt who is my photographer and always willing to take the photo's I need for my blog.  He is awesome!
Catch the Frenzy!

Sunday, January 15, 2012

So Grateful

What a great day to be inside making cards, as it's snowing in the Pacific Northwest. We now have about 3-4 inches of snow on the ground. I think snow is just magical and beautiful. My card today is a masculine card, which can be a challenge at time's. I do not have very many Cricut cartridges with masculine images, however I have raised two sons, so making masculine cards have always been a part of my card making creations. I was pretty excited to find on the Cricut Sampler, page 53 the trees using the bonus feature. Keeping in mind one of my resolutions for this year, use what I already have on hand, I found some wonderful plaid paper, wooden buttons and fibers to use for the card. I am entering this card in the Fantabulous Cricut Challenge Blog, Challenge Me Monday, #93.
For this card cut as follows...
Base of card:
Green - 8" x 7" fold in half to make a 3-1/2" x 8" card
Plaid - 5-1/2" x 3-1/2"
Cricut cuts - cardstock:
Cricut Sampler - page 59 <Trees> - 2-1/2"
Bonus feature
Inside of card:
Wild Card - page 46 <AllInOne> - 2"
Phrase feature
Other cuts:
2-3/4" square cream CS
2" square cream CS for the inside of the card
1 3/4" x 1" cream CS for message "So Grateful" or other message of choice
3" square dark green CS
1" square vineyard berry CS - cut into 2 triangles for upper corner
3-1/2" x 1" vineyard berry CS        

To complete the card...
  • Layer all pieces, working back to front as shown in the photo.
  • I used staples to anchor the 3-1/2" x 1" vineyard CS to the card base.
  • A fab element I like to use when creating masculine cards or layouts.
  • After layering the 3 square pieces, wrap the fibers around the bottom portion before adhering to the card base.
  • Adhere the message under the square pieces, just enough to have message peeking out.
  • Adhere the 4You to the 2" square cream CS for the inside.
  • Add fibers to the wooden tree and 3 round buttons.
  • Place as shown in the photo.

Catch the Frenzy!

Monday, January 2, 2012

Thank you

Happy New Year everyone!  Welcome to "Simply Frenzied", so glad you stopped by, as I am excited to share my first card in today's post.  One of my New Year's resolutions is to try to use supplies and products I already have on hand.  I have been creating cards for over 20 years, and until recently, I was a Close to My Heart consultant.  My inventory of papers, stamps, inks and assortment of accents is extensive.  Again, the plan is to create cards and papercrafts with items I have on hand.  I hope to list supplies, tools and brand names when possible.  However, the evolution of cardmaking and scrapbooking has changed over the past 20 years, so I may be kickin' it old school with some of my creations.  But, know that my goal is to share my passion for papercrafts, and to inspire you in your own unique creativeness. 
For this card cut as follows...

Base of card - cardstock:
Turquoise - 1 x 4-1/4"
White - 4-1/4" x 5-1/2"

Cricut cuts - cardstock:
Elegant Edges - page 59 <Flower2> - 4 inch
Frame feature

Simply Charmed - page 36 <Bird> - 2 inch
Layer 1 - Lt. Turquoise
Layer 2 - Red
Layer 3 - Turquoise
Layer 4 - Yellow
Shadow - Black


Other cuts:
1 inch flower punch - Lt. Turquoise
3/4" circle punch - Pink
1/2" circle punch - Turquoise

To complete the card...

Sponge Turquoise ink around the edges of flower pieces, layer 1 and layer 3 of the bird.

Sponge Red ink around the edges of the pink circle and layer 2 of the bird.
Using your favorite adhesive (I used my Xyron machine), adhere all pieces together, as shown in sample, working back to front.
Stamp "Thank You" (from Close to My Heart - D1361 Thank You set ) inside circle with Turquoise ink.

I added Red adhesive pearls from Recollections to the center of each flower and down the upper, left edge of the Turquoise paper.

All paper and ink from Close to My Heart.

Catch the Frenzy!
Related Posts Plugin for WordPress, Blogger...